Your First Tattoo Removal: The Ultimate Prep Checklist
Published on: March 15, 2026 | Last Updated: March 15, 2026
Written By: Ashita no Joe
Nervous about your first laser appointment and wondering how to get ready? That flutter in your stomach is completely normal; I felt the exact same way before my own first session years ago.
This guide gives you my personal, step-by-step checklist to walk in feeling confident and prepared. We’ll cover everything from your pre-appointment skincare and what to wear, to exactly what to expect during the session and how to care for your skin afterward.
Your Essential Pre-Removal Checklist
Start with a Professional Consultation
Never skip the consultation. This is your chance to vet the technician and understand the entire process. I won’t even work on a client without one.
Come prepared with a list of questions; a good technician will welcome them and give you direct, honest answers.
Key Questions to Ask During Your Consultation
- What type of laser technology do you use for my specific tattoo colors?
- How many sessions do you estimate for my tattoo’s size, colors, and age?
- Can I see before-and-after photos of your work on similar tattoos?
- What are the potential risks and side effects for my skin type?
- What is your protocol if I experience blistering or other reactions?
Your Immediate Pre-Appointment To-Do List
Once your session is booked, your preparation begins. What you do in the days leading up to your appointment directly impacts your comfort and results.
Proper hydration starts days before your session, not the morning of. Well-hydrated skin responds better to treatment and can heal more efficiently.
- Stop taking blood thinners: Avoid aspirin, ibuprofen, and certain supplements like Vitamin E for at least 48 hours before your session to minimize bleeding and bruising.
- Cancel your tanning plans: Do not tan or use self-tanner for a minimum of two weeks prior. Tanned skin significantly increases the risk of blistering and hypopigmentation.
- Shave the area: If your tattoo is in a hairy area, shave it the night before. This gives your skin a chance to calm down and provides the laser with a clear path to the ink.
- Arrive with clean skin: Do not apply any lotions, creams, or perfumes to the tattoo area on the day of your appointment. Come with it freshly washed.
What to Bring and Wear
Thinking ahead about your clothing and supplies will make the experience much smoother. Comfort is key.
Loose, soft clothing that doesn’t rub against the treatment area is non-negotiable for post-session comfort. I’ve seen clients wear jeans over a treated thigh and regret it instantly.
- Wear soft, breathable fabrics like cotton.
- Choose clothing that allows easy access to the tattoo.
- Bring a stress ball or fidget item if you have a low pain tolerance.
- Have a bottle of water with you to sip on before and after.
Manage Medications and Lifestyle Before Treatment
What you do in the weeks leading up to your appointment is just as critical as the laser session itself. Your body’s condition directly impacts how it responds to the laser and, more importantly, how it heals afterward. To understand what to expect in the days after treatment, review our aftercare guide for laser sessions. Following it can help you minimize irritation and speed healing. I’ve seen clients breeze through recovery because they prepped well, and I’ve seen others struggle with complications they could have easily avoided.
Medications to Discuss With Your Technician
Be completely transparent about everything you are taking, from daily prescriptions to the occasional supplement. Certain substances can make your skin more photosensitive, increasing the risk of adverse reactions like blistering or hyperpigmentation. This isn’t a time for secrets.
- Blood Thinners: Medications like aspirin, ibuprofen, or warfarin can increase bleeding and bruising. Your technician will advise you on when to safely pause them.
- Acne Medications: Oral treatments like Accutane (Isotretinoin) seriously thin the skin. You typically need to be off them for at least six months to a year before treatment.
- Certain Antibiotics: Some, like Doxycycline, can make your skin extremely sensitive to light. Always disclose any recent courses.
- Photosensitizing Drugs: This includes some antidepressants and diuretics. A full list is long, so disclosure is your safest bet.
- Vitamin E and Herbal Supplements: Things like Ginkgo Biloba and high doses of Vitamin E can also act as blood thinners.
I personally had to reschedule a removal session once because I was on a course of strong antibiotics for a sinus infection. It was frustrating, but it’s far better than dealing with a severe burn or scar.
Why You Must Avoid Sun Exposure
This is the one piece of advice I give that clients most often ignore, and they always regret it. A tan is your skin’s defense mechanism against UV damage, and a laser interprets that defense as a target. Treating tanned skin is like trying to erase a pencil drawing on top of a highlighter mark; you’re likely to remove the highlight and leave a shadow.
Sun exposure before treatment dramatically increases your risk of two outcomes:
- Burns and Blisters: The laser energy is absorbed more aggressively by the melanin in a tan, leading to superficial skin damage.
- Hypopigmentation: This is when the laser damages the skin’s ability to produce pigment, leaving permanent white spots where your tattoo used to be. This is often irreversible.
My rule is absolute: You must keep the tattoo area completely out of the sun for at least four weeks before your appointment. No exceptions. If the area is exposed while driving, cover it with clothing or a thick, opaque bandage. If you have any color in your skin from the sun, you need to reschedule. It’s that simple. This guideline is part of our tattoo removal sun exposure protection guide. Following these steps helps protect your skin and ensure the best removal results.
Preparing Your Skin on Treatment Day
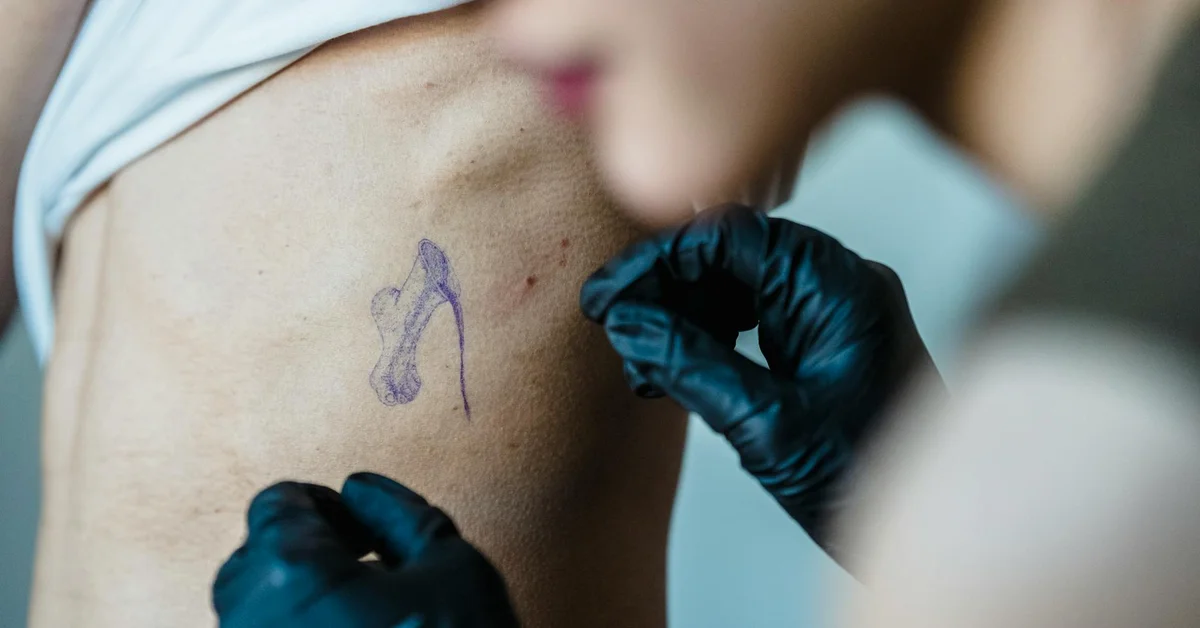
What you do the day of your appointment directly impacts your comfort and the treatment’s success. Proper skin preparation is a non-negotiable step that I enforce with every single one of my clients.
Your Pre-Session Skin Routine
Treat your skin like a clean canvas before the artist arrives. I follow this exact routine before my own removal sessions.
- Cleanse Thoroughly: Wash the tattoo area with a mild, unscented soap. Rinse with lukewarm water and pat completely dry with a clean towel. Do not use any harsh scrubs or loofahs.
- Arrive Bare: Come to your appointment with completely clean, product-free skin. This means zero lotions, creams, perfumes, deodorants, or sunscreen on or near the treatment area. These can interfere with the laser and increase the risk of adverse reactions.
- Shave the Area: If the tattoo has any hair growth, shave it the morning of your appointment. This allows the laser energy to target the ink pigment directly without being blocked or scattered by hair. Be gentle to avoid nicks or irritation.
What to Wear to Your Appointment
Your clothing choice matters more than you think. Think about comfort and accessibility.
- Wear loose, soft, and comfortable clothing that provides easy access to the tattoo.
- For a chest or back tattoo, a button-down shirt or a zip-up hoodie is perfect.
- For a leg tattoo, wear loose-fitting shorts or sweatpants.
- Avoid tight waistbands, rough fabrics like denim, or anything that will rub against the treated skin immediately after.
A Critical Note on Numbing Creams
Many clients ask about using numbing creams beforehand. Unless your technician has specifically prescribed and instructed you on a medical-grade numbing cream, do not apply anything yourself. I’ve seen DIY numbing attempts lead to poor laser results and even skin burns. The wrong cream can change the skin’s texture and hydration, making it behave unpredictably under the laser. If you are concerned about pain, discuss it with your provider; they have professional-grade solutions that are safe and effective. For pain management during tattoo removal, your provider can discuss professional-grade numbing creams as part of a tailored plan. Using supervised, medical-grade numbing options helps keep sessions tolerable without compromising results.
Setting Realistic Expectations for Your First Session
Your first laser tattoo removal session is a significant step, but it is not a magic eraser. You will not leave the clinic with a blank slate; the goal of the first appointment is to begin breaking down the tattoo’s ink particles so your body’s immune system can start clearing them away. Scientifically, laser energy breaks ink into tiny particles that the immune system gradually clears. Because this process depends on ink colors, laser type, and skin, multiple sessions are usually needed for noticeable fading. The immediate visual change is often subtle.
I’ve had clients who expected their tattoo to be half-gone after one visit, only to feel disappointed. From my own experience removing a dense black tattoo from my forearm, the first session made it look slightly more faded and fuzzy. The real fading happens in the weeks that follow, as I explain in detail here.
What You Will Actually See
Immediately after your session, expect some immediate visual and physical responses. This is normal and a sign the process is working.
- Frosting: The skin over the tattoo will turn a chalky white. This is a temporary reaction caused by the rapid heating of the ink and water in your skin. It usually fades within 30 minutes.
- Redness and Swelling: The area will look and feel like a mild to moderate sunburn. This inflammation is your body’s initial healing response.
- Slight Fading: Once the initial frosting and redness subside, you might notice the tattoo looks a little less sharp. Do not expect dramatic lightening right away; the most significant fading occurs over the next 4-8 weeks as your body flushes the shattered ink.
The Realistic Timeline for Fading
Tattoo removal is a process of patience. Your body needs time to do its job between sessions.
- Day of Treatment: Frosting, redness, swelling.
- First Week: The treated area may feel tender. Scabbing or blistering is common and part of the natural healing process.
- Weeks 2-6: Scabs fall off naturally. Underneath, the tattoo will appear lighter than it did before your session. This is when you see the first real results.
- Weeks 6-8: Your skin has mostly healed and your body has had time to clear the first round of ink. This is the standard waiting period before your next session.
Factors That Influence Your Results
Not all tattoos fade at the same rate. Several key elements determine how your body will respond.
- Ink Color: Black and dark blue inks absorb the laser’s energy best and are the easiest to remove. Reds, greens, and yellows are more stubborn and may require a different type of laser.
- Tattoo Age and Density: Older, more faded tattoos often respond faster. New, densely packed professional tattoos have more ink for the laser to break down, requiring more sessions.
- Your Skin Tone: Lighter skin provides a clearer contrast for the laser to target the ink without affecting the surrounding skin, which can make the process more straightforward.
- Your Overall Health: A strong immune system and good circulation are your best allies in this process. They help your body efficiently remove the ink particles.
I always tell my clients to take a “before” photo. Comparing your tattoo to a photo from before your first session, rather than your memory, is the only true way to gauge your progress and stay motivated. This is a marathon, not a sprint.
Your Immediate Aftercare Protocol

The first 48 hours after a laser session are the most critical for your healing process. Treat this period with the same seriousness you would a fresh, open wound because that is essentially what your skin has become. I’ve seen fantastic results turn mediocre simply from poor aftercare in these first two days. Blisters can occasionally form after a laser session. If they do, avoid popping them, keep the area clean and dry, and follow your clinician’s guidance for safe care.
What to Do Right After Your Session
Your skin will feel hot, swollen, and sensitive, similar to a bad sunburn. This is a normal inflammatory response.
- Apply a cold compress or an ice pack wrapped in a clean cloth for 15-minute intervals. This reduces swelling and soothes the burning sensation.
- Gently pat the area dry with a clean paper towel. Do not rub.
- Slather on a thin layer of the recommended ointment, like Aquaphor or a specialized post-laser cream. A thin layer is key-you want to protect the skin, not suffocate it in a greasy film.
- Keep the area elevated if possible, especially if it’s on a limb, to help minimize swelling.
The Non-Negotiable “Do Not” List
Your skin is vulnerable and working hard to flush out the shattered ink particles. After laser treatment, some pigments may oxidize and darken temporarily as the ink breaks down. This is a normal part of healing. Avoid anything that could irritate it or introduce bacteria.
- Do not pick, scratch, or peel the treated skin. I know the blisters and scabs are tempting, but you risk scarring and infection.
- Avoid tight clothing that will rub against the area.
- Stay away from hot tubs, saunas, pools, and long, hot showers. Heat increases swelling and inflammation.
- Do not use any harsh soaps, alcohol-based products, or exfoliants on the area.
- Absolutely no makeup on the area if it’s on your face.
Your Daily Care Routine for the First Week
Consistency in your routine prevents complications and sets the stage for optimal clearing.
- Wash the area gently twice a day with a mild, fragrance-free soap and lukewarm water.
- Pat it completely dry with a fresh paper towel. Do not use your bath towel, which harbors bacteria.
- Apply your prescribed ointment after each washing to keep the area moisturized and protected.
- Let the area breathe. When at home, leave it uncovered if you can do so in a clean environment.
Protecting Your Skin from the Sun
This is arguably the most important long-term rule of tattoo removal. Your laser-treated skin is hyper-sensitive to UV rays. In tattoo removal clinics, strict laser safety protocols help protect healing skin and prevent complications. Following post-treatment guidance, including sun protection and using approved sunscreen, supports safe results.
- Keep the area completely covered and out of direct sunlight for the first few weeks.
- Once fully healed, apply a high-SPF, broad-spectrum sunscreen (SPF 50+) to the area every single day, rain or shine. Sun exposure on a healing removal site is a direct ticket to hypopigmentation (permanent light spots) or hyperpigmentation (dark spots). I have a client who learned this the hard way, and we’re now dealing with discoloration that’s tougher to fix than the tattoo was.
Frequently Asked Questions
How many sessions are typically required for tattoo removal?
The number of sessions needed varies based on factors like tattoo size, ink colors, age, and your skin type, but most people require 6-12 sessions spaced 6-8 weeks apart for significant fading. A certified technician will provide a personalized estimate during your consultation, as individual responses can differ. To learn more about the number of sessions and timing for tattoo removal, visit our detailed guide.
What are the general requirements for undergoing tattoo removal?
General requirements include having healthy skin without infections or active sunburn, avoiding blood-thinning medications and sun exposure for weeks prior, and not being pregnant or breastfeeding. A thorough consultation with a qualified professional is essential to assess your eligibility and ensure safe treatment.
Is tattoo removal an affordable procedure?
Tattoo removal is generally not cheap, with costs ranging from $200 to $500 or more per session depending on size and location, and multiple sessions are usually needed. The total price often scales with the tattoo removal cost by size and the body part, since larger pieces and harder-to-treat areas require more sessions. While it may seem expensive, investing in a certified provider ensures better results and reduces risks, making it a worthwhile long-term commitment.
Closing Words
Approaching your first laser session with a solid plan transforms anxiety into confidence. Following this checklist ensures you walk in prepared, maximizing both your comfort and the treatment’s effectiveness. Your skin and your final result will thank you for the diligence.
Trust the process and your chosen professional. From my own experience and having seen hundreds of clients, proper preparation is the single biggest factor in a smooth, successful removal journey. You’ve got this.
Further Reading & Sources
- 13 Tips When You’re Preparing for Laser Tattoo Removal
- What to Expect From Your Tattoo Removal: First Session | Removery
Ink Fade Lab is your trusted source for tattoo removal insights, combining expert knowledge with compassionate care to help you make informed decisions about your tattoo journey. Based on years of experience in the tattoo removal industry, we are dedicated to providing accurate, up-to-date information to support your choices.
Preparing for Removal