Laser Tattoo Removal Aftercare: What to Expect After Every Session
Published on: February 13, 2026 | Last Updated: February 13, 2026
Written By: Ashita no Joe
Feeling a little lost about what to do after your laser session? That post-treatment uncertainty is completely normal, and managing your skin correctly is just as vital as the laser work itself.
This guide walks you through the entire healing journey, from the moment you leave the clinic to your fully recovered skin. We will cover the immediate steps to take after your session, the detailed week-by-week healing stages you’ll experience, and how to handle any unexpected reactions.
Understanding Laser Tattoo Removal Aftercare
Your skin’s healing process is the real workhorse after a laser session. Proper aftercare isn’t just about comfort; it directly influences how effectively your body clears the shattered ink particles. I’ve seen clients with identical tattoos experience vastly different results based solely on their commitment to aftercare. Think of your skin as a construction site-the laser creates controlled damage, and aftercare is the clean-up crew that ensures the site is safe and ready for the next phase of work.
Immediate Post-Treatment Steps: The First 24-48 Hours
This initial window is critical for setting the stage for optimal healing. Your primary goals are to soothe the intense initial reaction and prevent infection. Your skin has just been through a controlled trauma, and it needs you to be gentle and proactive.
Managing Initial Redness and Swelling
The treated area will look and feel like a bad sunburn, often with significant swelling. This is a normal inflammatory response.
- Apply a cold compress or an ice pack wrapped in a clean cloth for 15-minute intervals.
- Keep the area elevated above your heart whenever possible, especially if the tattoo is on a limb.
- Take an over-the-counter anti-inflammatory like ibuprofen if you are able, following package directions.
- Avoid any heat sources like hot showers, saunas, or direct sunlight on the area.
Icing is your best friend for the first day; it constricts blood vessels to reduce swelling and provides immediate, soothing relief. I always keep a bag of frozen peas on my studio’s couch for clients to use right after their session.
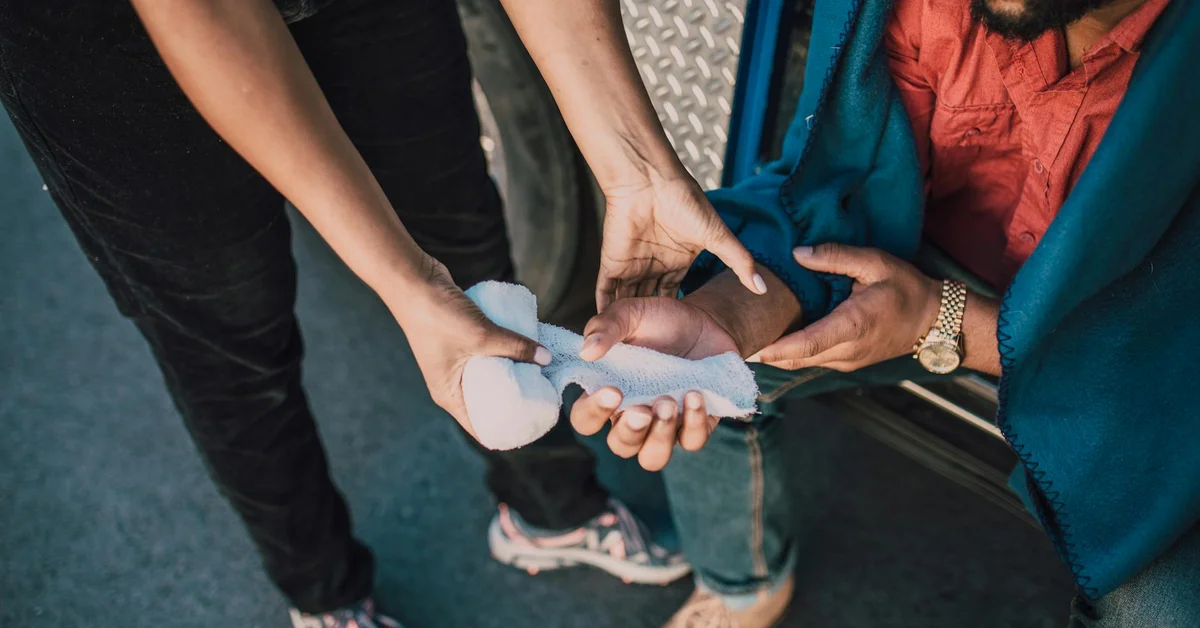
Cleaning and Moisturizing the Treated Area
Keeping the area clean is non-negotiable. An open wound, which is essentially what you have, is a prime target for bacteria. Using a proper aftercare ointment like Aquaphor can help seal in moisture and protect the healing skin. If your clinician has prescribed an antibiotic ointment, follow their directions and watch for signs of infection.
- Gently wash the area 2-3 times daily with a mild, fragrance-free soap and lukewarm water.
- Pat the area completely dry with a clean paper towel. Do not use a shared cloth towel.
- Apply a thin layer of a recommended ointment, like pure Aquaphor or a thin film of antibiotic ointment.
- Cover with a clean, non-stick bandage for the first night to protect it while you sleep.
The key to moisturizing is a thin layer; slathering on a thick coat can trap heat and bacteria, impeding the healing process. I learned this the hard way with a client who developed a minor infection from over-applying ointment. Let the skin breathe after the first 24 hours, switching to a simple, fragrance-free lotion as needed to prevent excessive dryness and cracking.
Navigating the Healing Timeline Week by Week
Your skin’s journey after a laser session is a process, not an event. Knowing what to expect at each stage prevents panic and promotes proper healing. I’ve guided hundreds of clients through this, and a predictable pattern always emerges. Should blistering occur, safely treat blisters after laser tattoo removal by not popping them and following your clinician’s aftercare instructions. If you notice redness, warmth, or discharge, contact your provider promptly.
Common Side Effects and How to Handle Them
Laser removal creates a controlled injury to break up ink. Your body’s inflammatory response is a normal, necessary part of flushing out the pigment. Don’t fight it; manage it wisely. What does it actually feel like? Most people describe a brief sting or snapping sensation, sometimes a warm or tingling heat.
- Swelling and Redness (Days 1-3): This is most intense right after your session. It looks and feels like a bad sunburn. Apply a cold compress (never ice directly on skin) for 15-minute intervals. The coolness constricts blood vessels, reducing swelling and discomfort.
- Blisters and Crusting (Days 2-5): Blisters mean the laser energy was effectively absorbed. Do not pop or pick at blisters-this is your body’s natural bandage. Let them dry out and flake off on their own. Popping them invites infection and can lead to scarring.
- Itching (Days 4-14): As new skin forms underneath, the area will itch intensely. This is the hardest part for most people. I recommend a thin layer of pure fragrance-free aloe vera or a recommended ointment. Slapping the area gently can also relieve the sensation without damaging the skin.
- Hypopigmentation (White Spots): The laser can temporarily stun the melanin-producing cells in your skin. This temporary lightening usually resolves itself over several weeks or months as the skin fully regenerates. Consistent sun protection is critical for recovery.
Essential Do’s and Don’ts for Effective Aftercare
Aftercare is not complicated, but it requires discipline. Your diligence in the first two weeks directly impacts your final results and skin health. I’ve seen perfect laser work ruined by poor aftercare. Tattoo removal clinics implement strict laser safety protocols to protect clients and staff. Eye protection, equipment checks, and proper skin assessment are standard before every session.
- DO keep the area clean and moist. Gently wash with a mild, fragrance-free soap and pat dry. Apply a thin layer of antibiotic ointment or specialized aftercare cream as directed by your technician.
- DO protect it from the sun like your results depend on it-because they do. Use a high-SPF, broad-spectrum sunscreen on the area every single day, even when it’s cloudy. Sun exposure can cause hyperpigmentation and hinder fading.
- DON’T soak the area. Avoid swimming pools, hot tubs, and long baths for at least one week. Standing water is a breeding ground for bacteria.
- DON’T pick, scratch, or shave the area. Let the scabs fall off naturally. Forcing them off can pull out ink that was targeted for removal and cause scarring. Wait until the skin is fully healed and no longer tender to shave.
- DON’T engage in heavy sweating for 48 hours. Skip the intense gym session. Sweat can irritate the fresh micro-wounds and introduce bacteria.
Tailoring Aftercare to Different Skin and Laser Types
Not all skin or lasers are the same, so your aftercare shouldn’t be one-size-fits-all. Your skin tone and the technology used demand a customized approach for safety and efficacy. I adjust my advice for every single client in my chair. When it comes to tattoo removal, the choice between pico vs Q-switched lasers matters for pigment breakup and recovery. I’ll help you understand which option is best for your skin tone and ink.
- Darker Skin Tones: Higher melanin content means a greater risk of temporary or permanent hypopigmentation. Aggressive cooling immediately post-treatment and religious sun avoidance are non-negotiable. We often use longer wavelengths that bypass melanin to target ink more safely.
- Sensitive or Fair Skin: You might experience more pronounced redness and swelling. A milder, more frequent moisturizing routine can soothe the intense inflammatory response without clogging pores.
- Q-Switched vs. Picosecond Lasers: Picosecond lasers often deliver energy in a shorter burst, which can lead to less thermal damage and sometimes less downtime. However, the core aftercare principles of cleanliness and protection remain identical.
Special Considerations for Facial Tattoo Removal
The skin on your face is thinner, more vascular, and heals differently than the skin on your arm. Facial removal requires a gentler touch and heightened vigilance. I speak from personal experience here, having had a small tattoo near my hairline removed. This is why tattoo removal sensitive skin care matters. Gentle routines, fragrance-free products, and strict sun protection help support healing on delicate facial skin.
- Expect more swelling. It’s common for eyelids to puff up after treating nearby areas. Sleep with your head elevated for the first few nights to help drain fluid.
- Makeup is a no-go until fully healed. You must wait until all crusting is gone and the skin is intact, usually 7-10 days. Applying brushes and sponges to a healing wound is asking for an infection.
- Be extra cautious with products. Only use the specific, gentle products your technician approves. The face is more reactive, and harsh chemicals can cause significant irritation or allergic reactions.
Selecting the Right Aftercare Products
Think of your skin after a laser session as a fresh, shallow wound. What you put on it matters immensely. I’ve seen too many clients complicate their healing with the wrong lotions and potions. Your goal is to support the body’s natural healing process, not fight it with harsh chemicals. Even after the removal is complete, this gentle approach remains essential to skin recovery. Care after tattoo removal—gentle cleansing, moisturization, and sun protection—helps prevent irritation and minimize scarring.
What to Look For
Your aftercare kit should be minimal, effective, and free of irritants.
- Antibiotic Ointment: Use a thin layer of a product like Bacitracin for the first 2-3 days only. This creates a protective barrier against infection. Do not overuse it, as it can trap too much moisture.
- Fragrance-Free Moisturizer: After the initial ointment phase, switch to a simple, heavy-duty moisturizer. I personally prefer pure Aquaphor or a basic, unscented Cetaphil cream. The simpler the ingredient list, the better it is for your healing skin.
- Gentle Cleanser: A mild, non-soap cleanser like Cetaphil or Dove Sensitive Skin bar is perfect. You want to clean the area without stripping it of its natural oils.
What to Absolutely Avoid
I cannot stress this enough. Certain products will set your healing back by weeks.
- Hydrogen Peroxide & Rubbing Alcohol: These are far too aggressive. They kill healthy cells along with bacteria, severely delaying the healing process.
- Products with Retin-A or Acids: Any anti-aging or acne treatment creams are a hard no. They increase skin sensitivity and can cause severe irritation.
- Heavily Scented Lotions or Vaseline: Fragrances are common irritants. While pure Vaseline is occlusive, I find Aquaphor provides better healing support.
- DIY Concoctions: I’ve had clients try lemon juice, salt scrubs, and other internet “remedies.” These methods are not just ineffective; they are dangerous and can cause permanent scarring. Trust the science, not the hype.
When to Seek Professional Help
Your body will do most of the work, but you are its first line of defense. Knowing the difference between normal healing and a red flag is a critical part of your aftercare responsibility.
Some redness, swelling, and pinpoint bleeding are completely normal for the first 24-48 hours. You might even see a white, frosty appearance on the skin immediately after treatment—this is a positive sign that the laser energy was effectively absorbed. In the days after your first session, expect mild redness and gradual fading as the skin heals. Your clinician will guide you on next steps and scheduling for subsequent sessions.
Signs You Need to Call Your Technician or Doctor
Do not try to tough it out if you experience any of the following. Prompt action prevents minor issues from becoming major problems.
- Spreading Redness: Redness that expands beyond the treated area, especially if it’s accompanied by hot skin, is a potential sign of infection.
- Pus or Yellowish Discharge: Clear fluid or a little lymph is normal. Thick, yellow, or green pus is not. This is a clear indicator of infection.
- Intense, Throbbing Pain: While discomfort is expected, severe, unrelenting pain that isn’t relieved by over-the-counter pain medication is a warning sign.
- Fever or Chills: This is your body signaling a systemic issue. If you develop a fever after a session, contact a doctor immediately.
- Prolonged Swelling: If significant swelling doesn’t start to subside after 3-4 days, it warrants a check-in with your removal specialist.
- Development of Blisters: Small blisters can be normal. Large, painful blisters that cover a big area need professional attention to prevent scarring.
I always tell my clients, “When in doubt, reach out.” A quick photo texted to your technician can provide peace of mind or the nudge you need to get proper medical care. Your skin’s health is the priority, and addressing complications early is the fastest path to a successful removal.
Frequently Asked Questions
What are laser aftercare instructions?
Laser aftercare instructions generally focus on keeping the treated area clean and protected, which includes gentle washing with mild soap, applying a thin layer of recommended ointment, and strictly avoiding sun exposure and soaking to prevent infection and support the body’s natural healing process.
What is the aftercare for laser treatment on the face?
Aftercare for facial laser treatment requires extra caution, such as using only approved gentle cleansers and moisturizers, avoiding makeup until the skin is fully healed, and applying high-SPF sunscreen daily to protect the delicate facial skin from irritation and pigmentation changes.
What are the LaserAway aftercare instructions?
LaserAway aftercare instructions typically involve using their specified products, like specialized ointments, following a strict routine of sun protection with broad-spectrum sunscreen, and adhering to any personalized guidance from their staff to ensure safe healing and optimal tattoo fading results.
Closing Words
Your commitment to proper aftercare directly shapes your final results and the health of your skin. Treat each session as a fresh start, following the same diligent protocol of protection, hydration, and patience you did the first time. The journey is cumulative, and every well-cared-for session builds upon the last.
Trust the gradual process and listen to what your skin tells you between appointments. Tattoo removal is performed by licensed professionals—usually a dermatologist, a trained laser technician, or a specialized clinician. Your laser technician provides the expertise, but your consistent aftercare delivers the clear skin. I’ve seen it make all the difference, both on myself and on hundreds of clients walking out my door with confidence. Understanding who performs the procedure helps you ask the right questions and choose a qualified specialist.
Further Reading & Sources
- r/TattooRemoval on Reddit: Aftercare…..why does everyone say different things??
- Laser Tattoo Removal Aftercare Tips [How to Heal Faster!]
Ink Fade Lab is your trusted source for tattoo removal insights, combining expert knowledge with compassionate care to help you make informed decisions about your tattoo journey. Based on years of experience in the tattoo removal industry, we are dedicated to providing accurate, up-to-date information to support your choices.
Healing Stages