Caring for Your Skin After Tattoo Removal
Published on: February 27, 2026 | Last Updated: February 27, 2026
Written By: Ashita no Joe
The final removal session is done, but are you wondering what comes next for your healing skin?
This guide provides the clear, practical aftercare steps you need for optimal recovery. You will learn how to protect the treated area, manage discomfort, and support your skin’s long-term healing to reveal the clear, healthy skin underneath.
Essential Immediate Aftercare Steps
Gentle Cleansing and Drying
Use mild, fragrance-free cleansers; pat dry with a clean towel; avoid hot water and harsh rubbing.
Your newly treated skin is incredibly vulnerable. I treat it like a fresh, delicate wound because that’s essentially what it is. Wash the area gently twice a day with a cleanser designed for sensitive skin-something without perfumes or harsh chemicals. Lukewarm water is your best friend here, as hot water can increase inflammation and discomfort. When drying, never scrub. I’ve learned the hard way that patting the area with a clean, disposable paper towel is far superior to a reusable cloth that can harbor bacteria.
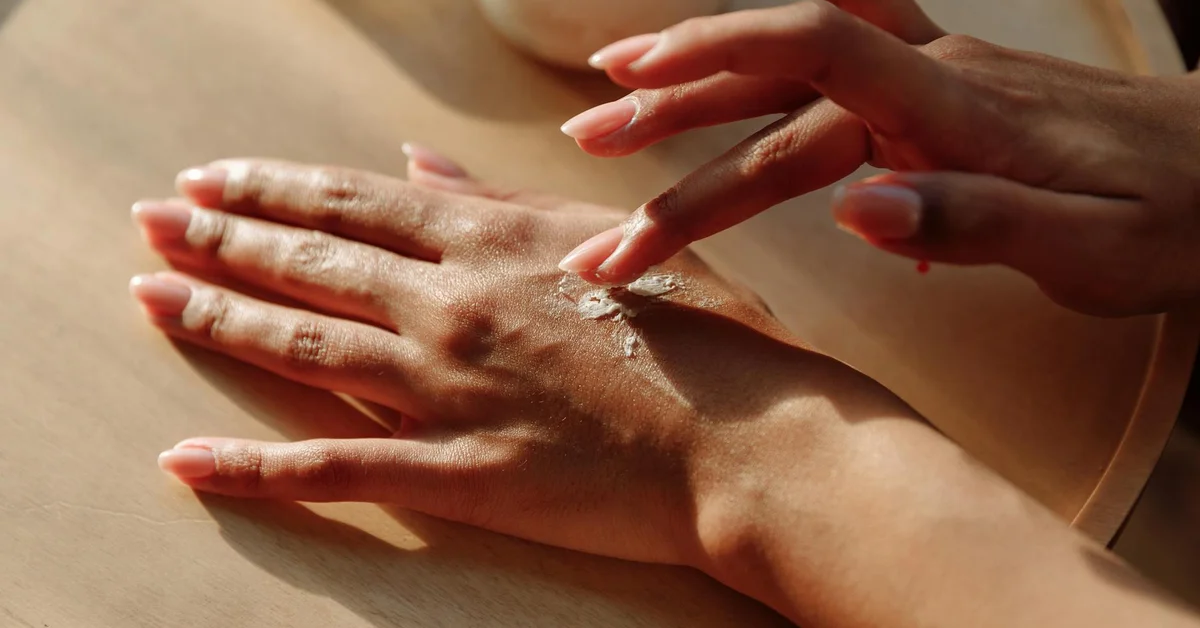
Moisturizing and Protection
Apply hypoallergenic ointments like petroleum jelly; use non-irritating moisturizers; keep skin hydrated.
After cleansing, a thin layer of a basic ointment like petroleum jelly creates a protective barrier. This keeps the healing environment moist, which is critical for proper skin regeneration. Think of this moisture layer as a biological bandage that your body needs to rebuild itself without interruption. After the first few days, you can often switch to a gentle, fragrance-free moisturizer. Hydrated skin heals faster and with less noticeable texture changes.
Avoiding Irritants and Trauma
Do not pick or scratch scabs; wear breathable clothing; steer clear of swimming pools and chlorine.
This is where most people sabotage their own results. The itching and scabbing can be intense, but you must not interfere. Picking a scab is like tearing off a construction site’s temporary roof-it exposes the raw, unfinished layers underneath to infection and scarring. Wear soft, loose-fitting clothing made from natural fibers like cotton to prevent chafing and allow the skin to breathe. Absolutely avoid submerging the area in pools, hot tubs, or the ocean; chlorine and bacteria are a guaranteed way to cause irritation and set back your healing.
Understanding the Healing Timeline
Stage 1: Initial Redness and Swelling
Lasts a few days; focus on gentle care and monitoring for signs of infection.
The first 24 to 72 hours are marked by redness, swelling, and a sensation similar to a bad sunburn. This is a completely normal inflammatory response. Your primary job during this phase is to be a vigilant observer, watching for any extreme pain, pus, or spreading redness that could signal an infection. Stick strictly to the gentle cleansing and moisturizing routine. I often recommend a cool compress (not ice directly on the skin) to help manage swelling during this initial period.
Stage 2: Blistering and Scab Formation
Skin may blister or form scabs; avoid disrupting them to prevent scarring.
Don’t be alarmed if small blisters or a firm scab forms. This is your body’s natural way of creating a protective shield over the damaged tissue. These blisters and scabs are not your enemy; they are a vital part of the healing process that you must allow to run its course. Popping a blister or picking a scab dramatically increases your risk of scarring and can even lead to permanent texture changes or hyperpigmentation. Let them detach on their own.
Stage 3: Peeling and Flaking
Skin naturally exfoliates; continue moisturizing and sun protection.
As the underlying skin heals, the top layer will begin to peel and flake away. This is a good sign! It means new skin is forming underneath. This is not the time to slack on moisturizer; keeping the new skin supple prevents it from cracking and helps it blend seamlessly with the surrounding area. Sun exposure is especially damaging now, as the fresh skin is highly susceptible to burning and darkening. Keep it covered or use a high-SPF, mineral-based sunscreen if you must be outside.
Stage 4: Full Recovery and New Skin Growth
Skin regenerates; emphasize long-term care like daily sunscreen.
The surface may look healed after a few weeks, but the deeper layers are still remodeling for several months. The texture and color will continue to refine. Making daily sunscreen a non-negotiable habit is the single most important thing you can do for the long-term appearance of your skin. UV rays can cause the treated area to darken or heal unevenly, undoing all your progress. I treat every day as a sunscreen day, regardless of the weather, on all my former removal sites.
Key Products for Post-Removal Skin Care
Cleansers and Moisturizers
Recommend non-toxic, hypoallergenic products; list options for gentle cleansing and hydration.
Your skin is raw and vulnerable after a laser session, much like a fresh tattoo. I treat my own skin with the same gentle respect during this phase. You must use a cleanser that doesn’t strip your skin’s natural barrier or cause any stinging. If blisters form, avoid popping them and keep the area clean and lightly moisturized. If blistering is present or worsens, consult your clinician for safe, tailored care.
Look for these specific qualities in your post-removal products:
- Fragrance-free formulas
- Hypoallergenic and non-comedogenic labels
- Soap-free and alcohol-free bases
From my own healing process, I found these types of products to be incredibly effective:
- Gentle Cleansers: Cetaphil Gentle Skin Cleanser, La Roche-Posay Toleriane Hydrating Gentle Cleanser, or simple sterile saline wash.
- Daily Moisturizers: Vanicream Moisturizing Cream, Aveeno Daily Moisturizing Lotion, or CeraVe Moisturizing Cream. These are workhorses for hydration.
Apply a thin layer of moisturizer to damp skin to lock in that essential hydration all day long.
Healing Ointments and Scar Prevention
Include petroleum jelly, silicone gel, vitamin E; discuss their role in minimizing scars.
In the first few critical days, your primary job is to create an optimal healing environment. I always keep a tube of plain petroleum jelly, like Vaseline, in my aftercare kit. A thin layer of petroleum jelly acts as a protective shield, preventing scabs from forming too thickly and cracking.
Once the initial healing is over, the focus shifts to scar and texture management.
- Silicone Gel Sheets or Gels: These are the gold standard in my professional opinion. They create a micro-environment that hydrates the skin and flattens raised scars. I’ve used them on clients with fantastic results.
- Vitamin E Oil: This is a classic, but I advise caution. While it’s a powerful antioxidant, some people develop contact dermatitis from pure vitamin E. Always patch test vitamin E oil on another part of your body before applying it to the treated area.
Sun Protection Essentials
Stress daily use of broad-spectrum sunscreen; explain UV protection importance.
This is non-negotiable. I tell every single one of my clients that sun protection is the most critical part of long-term aftercare. Your healing skin is hyper-sensitive to UV radiation. Sun exposure on a fresh removal site is a direct ticket to permanent hyperpigmentation or hypopigmentation. That is why safeguarding healing skin now is essential for long-term skin health. It minimizes the risk of permanent pigmentation problems years down the line.
You need a mineral-based, broad-spectrum sunscreen with an SPF of 30 or higher. Zinc oxide and titanium dioxide are your best friends here-they sit on top of the skin and physically block rays instead of chemically absorbing them, which is far less irritating.
Make applying sunscreen the very last step of your morning routine, every single day, rain or shine, for at least six months. I’ve seen people ruin perfect removal results by skipping this one simple step. This holds true for tattoo removal and other cosmetic procedures, where UV exposure can impair healing and pigment results. Maintaining this habit protects outcomes across treatments.
Common Risks and How to Avoid Them
Infection and Scarring
Monitor for redness, pus; avoid picking; use scar prevention techniques.
The skin is an open wound immediately after treatment. I’ve had a few clients learn this the hard way. Watch for signs that go beyond normal healing, like escalating redness, hot skin, yellow or green pus, or a foul odor. Any of these symptoms mean you need to see a doctor, not just wait it out.
The biggest cause of scarring I see is picking. Your fingers are the enemy.
- Do not pick, scratch, or peel any scabs or blisters.
- Let everything shed naturally, even if it’s itchy.
- Wear loose, breathable clothing over the area to prevent accidental snagging or rubbing.
Scarring often comes from secondary trauma to the area, not the laser itself.
Allergic Reactions and Skin Stress
Stick to fragrance-free products; watch for irritation; choose non-irritating items.
Your skin’s tolerance level is at an all-time low. This is not the time to experiment with a new perfumed lotion or an anti-aging acid serum. Fragrance is a leading cause of contact dermatitis and will set your healing process back by weeks.
If you notice increased redness, itching, or a rash where you’ve applied a product, stop using it immediately. Rinse the area with cool water and go back to the most basic routine: a gentle cleanser and a simple healing ointment. Listen to what your skin is telling you-it will react loudly to anything it doesn’t like.
Pigmentation Changes
Link to sun exposure; advise consistent sunscreen use and avoiding UV rays.
Pigmentation issues are the most common long-term complication, and they are almost entirely preventable. The laser disrupts the melanin in your skin, making it unstable. UV exposure forces that unstable skin to overproduce or underproduce melanin, leaving you with a dark or light spot that perfectly outlines your old tattoo. Removing UV blacklight tattoos introduces unique challenges because UV inks can react differently to lasers and may fluoresce under certain wavelengths. This article will discuss practical solutions for removing UV blacklight tattoos.
Avoiding this is straightforward but requires discipline.
- Wear high-SPF, broad-spectrum sunscreen daily.
- Cover the area with clothing when in direct sun for prolonged periods.
- Avoid tanning beds entirely during your healing journey.
Think of your sunscreen as the most important healing ointment you will ever use for your skin after tattoo removal. In the tattoo removal process, protecting the healing skin with sunscreen can prevent sun damage, hyperpigmentation, and uneven results. Regular sunscreen use supports faster recovery and cleaner, more even outcomes.
Long-Term Skin Maintenance Strategies
Daily Sun Protection
Incorporate sunscreen into routine; highlight UV protection for healed skin.
Your newly cleared skin is more vulnerable to UV damage than the surrounding area. I treat sunscreen application as non-negotiable, just like brushing my teeth. Make it the final step of your morning routine, every single day, regardless of the weather.
- Use a broad-spectrum sunscreen with an SPF of 30 or higher.
- Apply it generously to the entire area, even if the tattoo seems gone.
- Reapply every two hours if you are spending extended time outdoors.
Sun exposure can cause hyperpigmentation, making a dark shadow of your old tattoo reappear. After tattoo removal, the skin can be especially sensitive, and sun exposure may worsen uneven fading or leave residual pigment. Consistent UV protection is your best defense against this frustrating setback. I’ve seen clients undo months of progress with just one bad sunburn.
Hydration and Gentle Care
Use moisturizers regularly; avoid abrasive products; maintain skin health.
Think of your skin as healing for months, not weeks. A high-quality, fragrance-free moisturizer is your skin’s best friend during this extended recovery. I recommend applying it at least twice a day to keep the skin supple and support its natural barrier function.
- Avoid products with alcohol, retinoids, or harsh alpha-hydroxy acids (AHAs) on the treated area.
- Skip loofahs, rough washcloths, or abrasive scrubs over the skin.
- Pat the area dry after showering; never rub it vigorously.
From my own experience, the skin can feel tight and delicate long after the last session. Gentle care isn’t a suggestion-it’s a requirement for optimal results. Treat that skin like fine silk, not burlap.
Monitoring Skin Changes
Check for abnormalities; relate to scar prevention and overall skin integrity.
Get into the habit of visually checking the area whenever you moisturize. You are the first line of defense in spotting any changes that need a professional’s attention. Look for any subtle shifts in texture or color.
- Watch for raised, hard, or itchy areas that could indicate early scar formation.
- Note any persistent redness or dark spots that do not fade over time.
- Be aware of any skin that feels unusually thin or fragile.
Catching a minor issue early can prevent a significant problem later. Vigilant monitoring is the simplest form of scar prevention you can practice at home. Your skin tells you what it needs; you just have to learn to listen.
When to Seek Professional Help
Signs of Infection or Complications
List symptoms like excessive swelling, pain, or discharge; urge prompt contact.
The healing process should involve progressively less discomfort. After a removal session, swelling is common and should gradually subside with proper care. Following your clinician’s aftercare guidance can help manage swelling and reduce discomfort. A sudden increase in pain, swelling, or heat is your body sounding an alarm. Do not ignore it or try to tough it out. Contact your removal specialist or a doctor immediately if you notice any of the following:
- Yellow or green pus oozing from the area.
- Red streaks radiating from the treatment site.
- A fever accompanied by chills.
- Throbbing pain that intensifies rather than subsides.
In my clinic, I tell clients that a little clear fluid and redness are normal; anything else is a call to action. Prompt intervention for a potential infection can prevent permanent skin damage.
Unexpected Scarring or Pigmentation
Discuss when to consult for scar management or persistent issues.
Some skin changes are not emergencies but still require a professional opinion. If the skin develops a raised, shiny, or sunken appearance months later, you may be dealing with scarring. Similarly, if a dark or light spot remains stubbornly in place, that’s a pigmentation issue.
- Consult your specialist if the texture of the skin feels significantly different from the surrounding area.
- Seek help if hypopigmentation (lightening) or hyperpigmentation (darkening) does not improve after six months.
- Address any persistent itching or tenderness that disrupts your daily life.
I’ve had a small area on my own arm develop a slight texture change. Modern scar management and laser treatments can significantly improve these outcomes, but only if you seek help. Waiting often makes the problem harder to correct.
Frequently Asked Questions
What does aftercare involve for skin tag removal?
After skin tag removal, care focuses on keeping the area clean and dry, applying a recommended antibiotic ointment to prevent infection, and avoiding irritation from clothing or scratching. Healing is usually quick, with minimal scarring if the site is left undisturbed—much like the aftercare for saline tattoo removal.
How should I care for my skin after mole removal on the face?
Post-mole removal on the face, gently cleanse the area with a mild, fragrance-free soap, apply a petroleum-based ointment to maintain moisture, and protect it from sun exposure with high-SPF sunscreen to avoid pigmentation changes and support subtle scarring.
What is essential for post-laser hair removal skin care?
After laser hair removal, use cool compresses to reduce redness, avoid heat sources like hot showers, and apply a gentle, fragrance-free moisturizer to soothe the skin. Sun protection is critical to prevent hyperpigmentation while the skin calms down.
Closing Words
Your skin’s journey doesn’t end when the last laser session is over. The final, most crucial phase is the aftercare you provide in the following months. In this aftercare guide for laser sessions, you can expect practical tips on healing timelines, sun protection, and daily skin care. Knowing what to expect keeps you patient and proactive during recovery. Treat your healing skin with the same patience and diligence you applied throughout the removal process, and you will be rewarded with the best possible canvas.
Make high-factor, broad-spectrum sunscreen a non-negotiable part of your daily routine. Protecting that fresh skin from UV rays is the single most important thing you can do to prevent hyperpigmentation and ensure your results are clean and even. This is an investment in your skin’s long-term health, not just the end of a tattoo. Sun protection is especially crucial after tattoo removal.
Further Reading & Sources
- Laser Tattoo Removal Aftercare Tips [How to Heal Faster!]
- Laser Tattoo Removal Aftercare | Removery: Tattoo Removal
Ink Fade Lab is your trusted source for tattoo removal insights, combining expert knowledge with compassionate care to help you make informed decisions about your tattoo journey. Based on years of experience in the tattoo removal industry, we are dedicated to providing accurate, up-to-date information to support your choices.
Long-Term Skin Health