The Truth About Removing UV and Blacklight Tattoos
Published on: January 4, 2026 | Last Updated: January 4, 2026
Written By: Ashita no Joe
Realizing your glow-in-the-dark tattoo isn’t the statement you hoped for? You’re not alone. This guide explains the unique challenges of UV ink removal and gives you a clear path forward, based on my years of experience in the tattoo and removal industry.
We will cover why these vibrant pigments are notoriously difficult to erase, the most effective professional removal methods available today, and what you can realistically expect in terms of risks, costs, and final results.
Understanding UV and Blacklight Tattoos
These tattoos are not made with magic. They use special inks containing phosphors that absorb invisible ultraviolet light and re-emit it as visible light, creating that glowing effect.
The ink sits in the same dermis layer as traditional tattoos, but the chemical makeup is entirely different. This fundamental difference in ink chemistry is the root cause of all the unique removal challenges you will face. Understanding the pigments, carriers, and additives in modern inks is essential because their chemistry dictates how they respond to removal methods. In short, tattoo ink materials science and chemistry determine the effectiveness and safety of removal techniques.
Why UV Tattoo Removal Is More Complex
From my own experience working on these, removing a UV tattoo is a completely different ballgame compared to a standard black tattoo. The process is less predictable and requires more specialized equipment. The tattoo removal process explained will help you understand why UV ink responds differently and what to expect in each session.
I’ve seen clients come in frustrated after being turned away from other clinics that weren’t equipped or knowledgeable enough to handle their glowing ink. Standard removal protocols simply do not apply, and attempting to use them can lead to poor results or even skin damage.
Ink Composition and Laser Interaction
Traditional tattoo inks are made of stable metal salts and carbon-based pigments. Laser light shatters these large pigment particles into tiny fragments that your body’s immune system can then clear away.
UV-reactive inks are a different beast. Their composition is often a proprietary secret, but they frequently rely on compounds that are more transparent to visible light.
- The particles can be more resistant to fragmentation.
- Some inks may contain substances that change color (hypopigmentation) or turn darker (paradoxical darkening) when hit with a laser.
- I’ve personally witnessed a UV tattoo turn a murky gray-brown after a first laser session, a clear sign of a complex chemical reaction.
You cannot assume the laser will interact with a UV tattoo the same way it does with your other tattoos. A patch test is absolutely non-negotiable.
Laser Wavelength Considerations
Not all lasers are created equal, and this is critically true for UV tattoos. The standard 1064 nm wavelength used for dark inks often has little to no effect on the transparent, phosphorescent pigments.
Targeting these unique inks requires a different approach.
- Practitioners often need to use a spectrum of wavelengths to see which one the ink will absorb.
- The Q-switched Nd:YAG laser at its 532 nm setting is sometimes more effective for certain colors.
- Picosecond lasers, with their ultra-short pulse durations, can be superior for shattering the stubborn, larger particles found in some UV inks.
Finding a clinic with a multi-wavelength, advanced laser platform is not a luxury for UV tattoo removal; it is a necessity. The wrong wavelength will pass straight through the ink, doing nothing but charging you for the session. If you’re looking for a guide to finding reputable clinics for laser tattoo removal near you, this quick checklist will help you compare options and verify credibility before booking. Prioritize clinics that publish transparent safety protocols, qualified practitioners, and before-and-after evidence.
Effective Laser Removal Methods for UV Tattoos
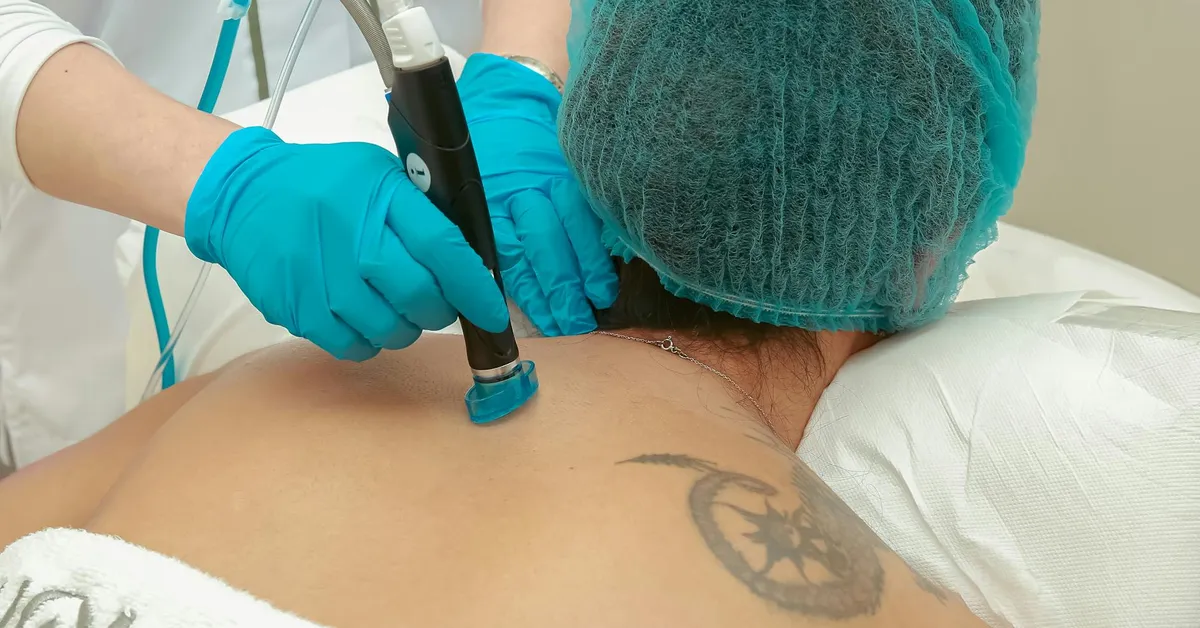
Standard tattoo removal lasers often struggle with UV-reactive ink. The unique chemical composition of these pigments requires a more nuanced approach to break them down effectively and safely. I’ve personally seen cases where the wrong laser setting left a ghost image that still glowed under blacklight. In clinics, strict laser safety protocols guide every session. These practices help protect clients and staff when dealing with UV-reactive inks.
Q-Switched Laser Applications
Q-switched lasers have been the industry standard for years, and they can be adapted for UV ink removal. These devices work by delivering a very short, powerful burst of energy that shatters the ink particles.
- The 1064 nm wavelength is typically used for darker UV pigments.
- For brighter, more fluorescent colors, the 532 nm setting is often employed.
- Practitioners must use lower fluence settings initially to test the skin’s reaction.
Think of it like using a precise chisel instead of a sledgehammer; you need to gently fragment the ink without damaging the surrounding canvas of your skin. The goal is to break the particles into pieces small enough for your body’s immune system to carry them away.
Picosecond Laser Advantages
Picosecond lasers represent the newer generation of removal technology. They operate on the same principle as Q-switched lasers but with a critical difference: speed.
- Picosecond lasers deliver energy in trillionths of a second, much faster than Q-switched nanosecond pulses.
- This ultra-short pulse duration creates a more powerful photomechanical effect, shattering stubborn UV ink more efficiently.
- They often result in fewer treatment sessions and reduced risk of thermal damage to the skin.
In my practice, I’ve found picosecond lasers to be superior for tackling the complex molecular bonds in UV ink. The speed of this technology minimizes the heat spread, making it a safer choice for delicate areas and reducing the chance of textural changes or hypopigmentation.
Treatment Process: Sessions and Timeline
Removing a UV tattoo is a marathon, not a sprint. Patience is your most valuable asset throughout this journey.
- Initial Consultation: A patch test is non-negotiable. We need to see how your skin and the specific ink react to the laser.
- Session Frequency: Treatments are spaced 6 to 8 weeks apart. This gives your body time to flush out the fragmented ink and your skin time to heal fully.
- Total Sessions: Expect a longer process than with standard tattoos. Complete removal of a UV tattoo can require anywhere from 8 to 12 sessions, sometimes more.
You will see the tattoo fade gradually over many months, not disappear after one or two appointments. The timeline is heavily influenced by your immune system, the ink’s age, and the skill of your technician. I always remind my clients that the skin they heal with between sessions is just as important as the laser work itself. Understanding the progression of tattoo removal helps set realistic expectations.
Risks and Safety in UV Tattoo Removal
The very properties that make UV tattoos glow also make their removal a higher-stakes procedure. Improper technique can lead to burns, permanent scarring, or paradoxical darkening where the ink turns darker instead of fading. To protect healing skin, follow a tattoo removal sun exposure protection guide. It recommends avoiding sun exposure on fresh treated areas, applying broad-spectrum sunscreen, and using protective clothing when you must go outside.
- Ink Composition Unknowns: Many UV inks contain phosphorus or other reactive metals. When zapped with a laser, these can cause unpredictable chemical reactions in the skin.
- Hypopigmentation: The laser can permanently damage the melanin-producing cells, leaving white spots where the tattoo once was.
- Hyperpigmentation: Conversely, the inflammation can trigger an overproduction of melanin, leaving dark spots.
I cannot stress this enough: Do not attempt to remove a UV tattoo yourself with DIY methods. The risks of DIY tattoo removal include infection, severe scarring, and systemic toxicity from released ink particles, all of which are far too great. Your safety depends on seeking a qualified professional who understands the unique challenges of these specific pigments. Home DIY removal attempts are notoriously risky and can leave more visible scarring. A professional can assess the pigment and tailor the safest, most effective approach.
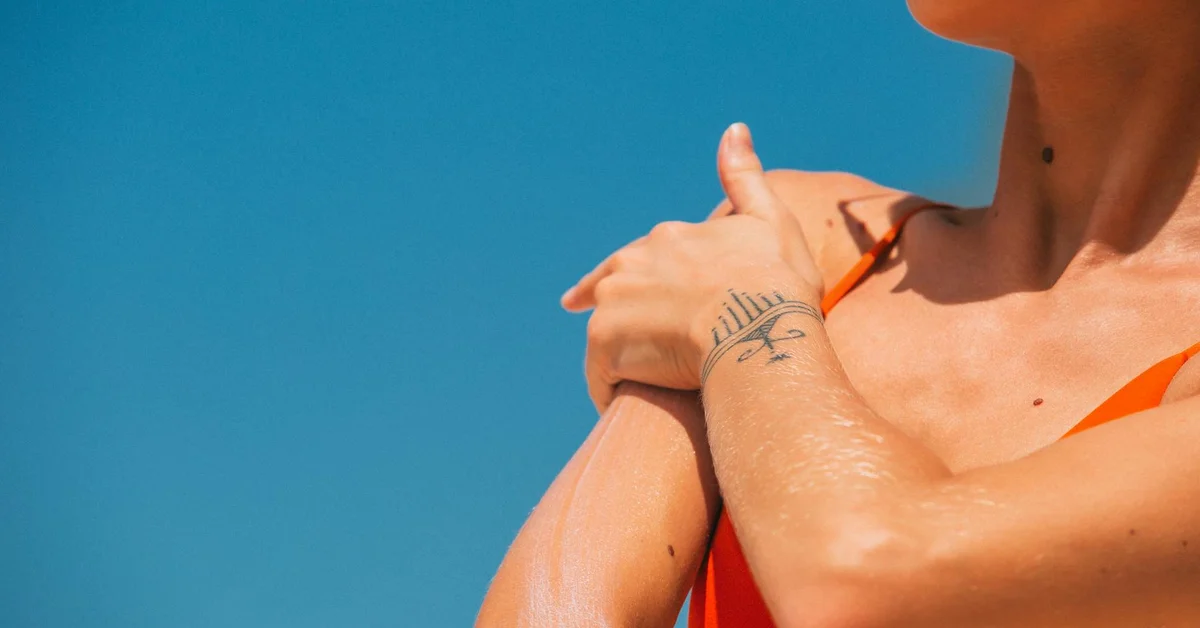
Aftercare and Managing Sun Sensitivity
After any removal session, your skin enters a fragile state. With UV-reactive tattoos, this period is even more critical. The treated area becomes intensely photosensitive, reacting to sunlight in a way that can set back your progress and cause hyperpigmentation. Hyperpigmentation after tattoo removal is a common concern during healing. Protecting the area from sun exposure can help prevent it. I’ve seen clients develop dark spots that lasted for months from a single careless afternoon in the sun.
Your Post-Treatment Sun Protocol
Think of your skin after a UV tattoo removal session as having a permanent, severe sunburn. You must protect it.
- High-SPF, Mineral-Based Sunscreen: Use a broad-spectrum SPF 50+ sunscreen with zinc oxide. Apply it religiously, even on cloudy days and when you’re indoors near windows.
- Physical Barriers are Non-Negotiable: Do not rely on sunscreen alone. Wear clothing that fully covers the area. I kept a lightweight, long-sleeved shirt in my car for years to protect a removal site on my forearm.
- Avoid Peak Sun Hours: Plan your outdoor activities for early morning or late afternoon. The goal is zero direct sun exposure on the healing skin.
The Healing Process and What to Expect
Your skin will tell you exactly how it’s doing. Listen to it.
- Blistering and swelling are common for the first few days. This is a normal inflammatory response.
- Resist the urge to pick at any scabs. Let them flake off naturally to prevent scarring.
- The tattoo will appear lighter between sessions as your body’s immune system flushes out the fragmented ink particles.
Proper aftercare is not just about comfort; it directly influences how many sessions you’ll need and the final clarity of your skin. A sunburn on a healing removal site can feel like a bad chemical burn and can permanently stain the skin.
Non-Laser Options and Cover-Up Considerations
While laser is the gold standard, I understand it’s not for everyone. Let’s talk about the other paths, but I’ll be straight with you about their effectiveness on UV ink.
Surgical Excision
This is a one-and-done option, but only for very small tattoos. A surgeon literally cuts the tattooed skin out and stitches the area closed. This method guarantees complete removal but leaves a linear scar. It’s a trade-off: a scar for certainty. To help you decide, our surgical excision tattoo removal guide covers candidacy, graft options, and recovery. It also compares this method to alternatives and explains what to expect in healing.
Salabrasion and DIY Methods
I must caution you strongly against at-home removal techniques. Salabrasion, which involves scrubbing the skin with salt, is an ancient and brutal method. These unregulated procedures carry a massive risk of infection, significant scarring, and inconsistent results. The unique composition of UV ink makes it particularly resistant to these surface-level attacks. I would never perform this on a client or attempt it on myself.
The Reality of Tattoo Cover-Ups
Covering a UV tattoo with a new design is a complex art. The original ink can still react to blacklight, potentially creating a ghost image beneath your new art.
- Laser Pre-Treatment is Ideal: Most artists, myself included, prefer you undergo a few laser sessions first. This lightens the UV tattoo, giving us a cleaner canvas to work with and preventing the old design from showing through.
- Consult a Specialist Artist: Not all tattoo artists are experienced in covering UV ink. You need someone who understands how to choose pigments and design a pattern that will effectively mask the underlying glow.
- Dark and Dense is the Rule: Successful cover-ups often involve darker, more saturated designs. A delicate watercolor piece will likely fail to conceal the bright base of a UV tattoo.
Attempting a cover-up without first lightening the original tattoo is a major gamble that often leads to a muddy, visible final product. A few strategic laser sessions can make the difference between a cover-up you love and one you need to remove later. For a fade tattoo cover up, having an evenly faded base is crucial. That even fade helps the new design blend cleanly and look intentional.
Frequently Asked Questions
Are UV tattoos permanent?
UV tattoos are not inherently permanent, but they are exceptionally difficult to remove completely due to their unique phosphorescent ink composition, which often resists standard removal methods and requires specialized laser treatments for effective fading.
What is the best tattoo removal method for UV tattoos?
The most effective removal method for UV tattoos involves using advanced laser technology, such as picosecond or multi-wavelength Q-switched lasers, which are specifically calibrated to target and break down the complex, transparent pigments found in UV-reactive inks.
Why do some UV tattoos turn red or change color during removal?
Some UV tattoos may turn red or darken due to paradoxical darkening, a reaction where the ink’s chemical components unpredictably shift color when exposed to laser energy, emphasizing the critical need for a professional patch test before starting treatment.
Closing Words
Removing a UV tattoo is a unique journey that demands respect for the ink’s complex chemistry. Its unpredictable behavior under laser light means you need a specialist who has navigated these waters before and has the right technology to handle the potential for fading or darkening.
Always choose a professional removal service over any DIY method to protect your skin from irreversible damage. With patience and the right expert by your side, you can successfully clear the way for a fresh start.
Further Reading & Sources
Ink Fade Lab is your trusted source for tattoo removal insights, combining expert knowledge with compassionate care to help you make informed decisions about your tattoo journey. Based on years of experience in the tattoo removal industry, we are dedicated to providing accurate, up-to-date information to support your choices.
Non-Laser Methods