How to Remove Temporary Tattoos and Stencils at Home, Fast
Published on: February 14, 2026 | Last Updated: February 14, 2026
Written By: Ashita no Joe
Got a temporary tattoo that’s overstayed its welcome or a stencil that just won’t fade? You’re not alone-I’ve been there with my own kids and clients, staring at a stubborn design that should have washed off days ago.
This guide gives you clear, step-by-step methods to get your skin clean again. We’ll cover the best removal techniques using common household items like baby oil and soap, highlight what to avoid to prevent skin irritation, and share my professional tricks for dealing with the most persistent temporary inks.
Understanding Temporary Tattoos and Stencils
Types of Temporary Tattoos and Their Adhesives
Not all temporary tattoos are created equal, and their removal depends heavily on the glue holding them on. I’ve seen everything from simple kids’ tattoos to intricate festival designs that cling for days.
- Water-Slide Decals: These use a mild water-activated adhesive. The design is pressed onto damp skin and the backing paper slides off. These are often the easiest to remove as the adhesive isn’t formulated for extreme longevity.
- Henna and Jagua: These aren’t adhesives at all but natural dyes that stain the top layers of your skin. Removal is about accelerating skin cell turnover, not dissolving glue.
- Airbrush Stencils: The stencil itself uses a light, spray-on adhesive to stick to the skin so the artist can paint over it. It’s meant to be temporary but can feel tacky.
- Professional-Grade Stick-Ons: These use stronger, latex-based or acrylic adhesives for a multi-day hold. They are tougher and require a bit more effort to break down.
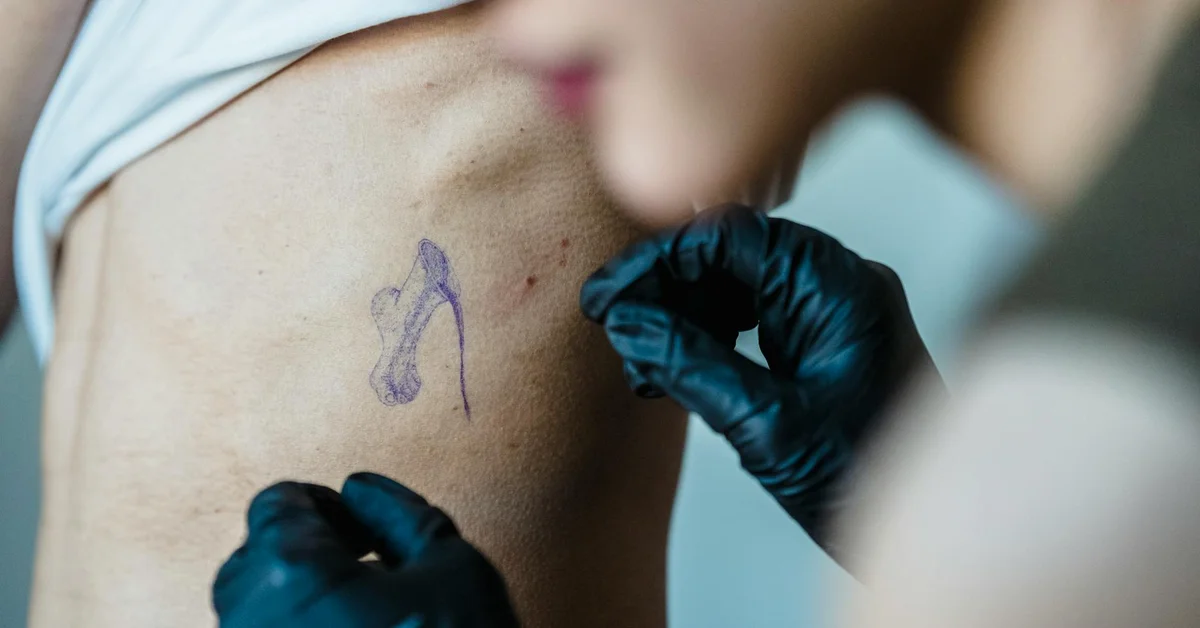
How Stencils Differ from Stick-On Tattoos
Many people confuse the two, but in my studio, we treat them as separate entities. A stick-on tattoo is the final product-the decorative art you show off. A stencil is a tool, a guide for the permanent tattoo artist.
- Stencils are a blueprint. They transfer a thin layer of ink and adhesive to the skin to outline where the real tattoo will go. They are not designed to last.
- Stick-on tattoos are the finished art. They are a complete, often colorful, design with a stronger adhesive meant to withstand daily activities.
- Stencils use a different transfer medium. The adhesive is in the stencil paper or transfer gel, designed to hold the ink outline in place for minutes, not days. This fundamental difference in purpose makes stencils generally easier to wipe away than a stubborn stick-on tattoo.
Essential Tools and Safe Ingredients for Home Removal
Common Household Items Like Oils and Alcohol
You don’t need a professional kit to get the job done safely. I keep a simple arsenal in my own bathroom for quick cleanups after practicing stencil work.
- Carrier Oils (Coconut, Olive, Baby): Oil breaks down adhesive. Gently massage a small amount onto the tattoo and let it sit for a minute to dissolve the glue. This is my first-line defense for most temporary tattoos because it’s gentle and moisturizing.
- Rubbing Alcohol (Isopropyl Alcohol): Excellent for dissolving the adhesive in stencils and some water-slide decals. It can be drying, so I follow up immediately with a moisturizer.
- Warm, Soapy Water: Simple and effective. Soak a cloth in warm water with a mild soap, hold it against the tattoo to loosen the adhesive, then gently wipe.
- Tape or a Gentle Adhesive Remover: For very stubborn adhesives left behind, gently dabbing the area with the sticky side of tape can lift the residue. For commercial products, only use those specifically formulated for skin.
Products to Avoid for Skin Safety
I’ve treated clients who learned the hard way that aggressive chemicals are not the answer. Your skin is an organ, not a countertop.
- Nail Polish Remover (Acetone): This is a hard no. It will strip your skin’s natural oils, cause extreme dryness, irritation, and can even lead to chemical burns. I would never use acetone on my skin or a client’s, no matter how stubborn the tattoo seems.
- Paint Thinner, Gasoline, or Solvents: These are industrial-grade chemicals. They are poisonous and can be absorbed through your skin, causing systemic harm.
- Abrasive Scrubs or Pumice Stones: Scrubbing too hard with salt or sugar scrubs can cause micro-tears in the skin, leading to irritation and potential infection. Be gentle.
- Bleach or Household Cleaners: These are designed for surfaces, not human skin. They can cause severe burns, blistering, and permanent damage.
Step-by-Step Methods for Temporary Tattoo Removal
Oil-Based Techniques Using Coconut, Baby, or Olive Oil
Oils are my go-to for a reason-they break down the tattoo’s adhesive without declaring war on your skin. Coconut oil is a powerhouse because it’s antimicrobial and super hydrating, while baby oil’s mineral oil base is a classic, gentle dissolver. Olive oil works in a pinch, though it’s a bit thicker. I always have a bottle of coconut oil in my studio for this exact purpose.
Application with Cotton Pads and Gentle Rubbing
Douse a cotton pad generously with your chosen oil and press it onto the tattoo for 30 seconds to let it saturate. Gentle, circular rubbing is the key; you’re melting the ink away, not sanding down wood. I’ve seen people scrub too hard and end up with a red, angry patch of skin next to a perfectly clean one. Let the oil do the work. However, this at-home method isn’t how professional tattoo removal is typically done. A laser-based removal process—the standard approach—is explained in detail by clinics and guides.
Using Rubbing Alcohol or Acetone-Based Removers
These are the heavy artillery. Rubbing alcohol (isopropyl alcohol) is effective, but acetone is the nuclear option-it’s what I use to clean stencil ink off my own equipment. Reserve acetone for the most stubborn, vinyl-like temporary tattoos that laugh at oil. It will dry your skin out something fierce, so have your moisturizer ready. Tattoo ink chemistry note: inks are pigments suspended in carriers, so removal is essentially dissolving those ingredients. That’s why certain solvents work best and why post-cleanup moisture matters.
Precautions to Prevent Skin Irritation
Do not, under any circumstances, pour these directly onto your skin. Apply a small amount to a cotton ball and dab-do not rub aggressively. Your first sign of stinging or redness means you need to stop immediately and rinse with cool water. I learned this the hard way on my own wrist; the tattoo came off, but I had a dry, flaky spot for days.
Makeup Remover and Adhesive Remover Options
Bioderma Sensibio H2O or any oil-based makeup remover is fantastic for this. They are literally designed to dissolve pigments gently. Adhesive removers, like those used for medical tape, are also brilliant as they target the glue binding the tattoo to your skin. I keep a bottle of Uni-Solve in my kit for clients with sensitive skin who need a stencil removed. In the broader world of noninvasive tattoo removal techniques, laser-based methods are commonly used to target ink beneath the skin.
How to Apply Without Harsh Scrubbing
Soak a cotton round and lay it flat on the tattoo like a compress. Hold it there for a full minute. When you lift the pad, you’ll often see most of the tattoo has transferred onto it, eliminating the need for scrubbing altogether. Any remaining bits will wipe away with a soft, follow-up swipe. This is the method I use on my own kids, especially when dealing with the process of removing a fresh tattoo.
Removing Tattoo Stencils Without Causing Damage
Soap and Warm Water Method
For a fresh stencil, sometimes simple is best. Warm water and a basic, unscented glycerin soap can work wonders. Lather up your hands and massage the area with your fingertips-the warmth and slip from the soap loosen the stencil ink effectively. This is the first thing I try in the studio before moving on to anything stronger.
Gentle Exfoliation with Damp Cloths
A washcloth soaked in warm water and wrung out makes a great gentle exfoliator. Lay the warm, damp cloth over the stencil for a moment to steam it lightly, then use a soft, circular buffing motion. The texture of the cloth provides just enough abrasion to lift the pigment without scraping the skin’s surface.
Tape Technique for Stubborn Residue
This is a pro-trick for the last little bits that refuse to budge. Use a strong, clear household tape like packing tape. Press the sticky side firmly onto the stencil residue and pull it off in a quick, smooth motion-it acts like a mini surface peel. I use this to clean up stencil lines on clients all the time. Repeat until the last speck is gone.
Special Tips for Sensitive Skin and Children
Patch Testing Oils and Removers First
This isn’t a suggestion; it’s a rule. Before you slather any product on a large area, test it. Apply a dime-sized amount of the oil or remover to a discreet patch of skin, like the inner arm, and wait 15 minutes. Look for any signs of redness, itching, or swelling. I’ve avoided many potential reactions with this simple, 60-second step.
Kid-Friendly Approaches to Minimize Fuss
Turn it into a game, not a chore. Let them choose the oil scent or hold the cotton pad. Distraction is your best tool-do the removal while they’re watching their favorite show or listening to a story. I tell parents to use a “magic lotion” (baby oil) that makes the tattoo disappear. Praise and a small reward afterward work miracles.
Preventing Irritation on Delicate Skin
Delicate skin needs a buffer. After using any remover, immediately apply a thick, fragrance-free moisturizer or balm like Aquaphor. This replenishes the skin’s barrier and soothes any potential irritation before it even has a chance to start. For the most sensitive skin, stick exclusively to oil-based methods and avoid alcohol or acetone entirely.
Common Mistakes to Avoid During Removal
Over-Scrubbing or Peeling Skin
I’ve seen too many people treat their skin like a dirty pan that needs scouring. Scrubbing aggressively with a loofah or washcloth might seem effective, but it’s a fast track to redness, micro-tears, and irritation. Your goal is to lift the pigment, not strip your first layer of skin. I learned this the hard way on a stubborn stencil, ending up with a raw patch that took longer to heal than the tattoo would have lasted. With saline tattoo removal, the healing phase often includes a light scab as the pigment surfaces. Gentle aftercare—no picking, mild cleansing, and any recommended ointment—helps the skin recover and keeps the process on track.
Forcing a temporary tattoo to peel before it’s ready is just as damaging. Let the removal agents do the work.
Using Harsh Chemicals Neat
Rubbing alcohol, acetone, or even strong adhesive removers straight from the bottle is a recipe for disaster. These chemicals are incredibly drying and can cause chemical burns or severe contact dermatitis. Always dilute strong solvents with a bit of water or mix them with a carrier oil to buffer their intensity. Your skin is a living organ, not an inanimate surface to be cleaned.
I keep a small spray bottle of diluted isopropyl alcohol (about 50/50 with water) specifically for stencil cleanup because pure alcohol is too harsh for most skin types.
Skipping Moisturizer After Removal
This is the most common error I witness. The removal process, even when done gently, strips the skin of its natural oils. Leaving the skin bare and dry after this insult is a major misstep. Immediately applying a gentle moisturizer post-removal seals in hydration and kick-starts the skin’s repair process. It’s the difference between soft, supple skin and a tight, flaky, irritated mess the next day.
Aftercare for Healthy Skin Post-Removal
Moisturizing with Gentle Lotions
Your skin is vulnerable after you’ve removed the tattoo or stencil. Reach for a simple, fragrance-free lotion or a basic ointment like plain petroleum jelly. Look for ingredients like ceramides or hyaluronic acid, which help rebuild the skin’s natural barrier without clogging pores. I always have a tube of a basic, drugstore moisturizer in my kit for this exact purpose. Apply a thin layer and let it absorb fully. Now that the removal is complete, continue this gentle care to support complete healing. Keep the area out of direct sun and avoid irritants to minimize irritation and scarring.
Applying Sunscreen to Protect the Area
This step is non-negotiable if the area will see the sun. The newly exposed skin is more susceptible to UV damage, which can lead to hyperpigmentation or dark spots. Use a broad-spectrum sunscreen with at least SPF 30 on the area for the next few days, even if it’s overcast. Think of it as a protective shield for your fresh, new skin cells.
When to Consult a Professional for Issues
Home removal is generally safe for temporary inks, but you must know when to stop. If you see any of the following signs, it’s time to see a doctor or dermatologist:
- Intense redness, swelling, or pain that worsens after 24 hours.
- A rash, hives, or blisters forming at the site.
- Signs of a skin infection, like pus or yellow crusting.
- A chemical burn that leaves the skin white, leathery, or numb.
Persistent itching or discoloration that doesn’t fade within a week also warrants a professional opinion. It’s always better to get a clear diagnosis than to hope a problem will resolve on its own.
Frequently Asked Questions
Can I use a temporary tattoo removal cream at home?
Yes, over-the-counter temporary tattoo removal creams can be effective, as they often contain gentle solvents or oils that break down the adhesive without harsh scrubbing. Always perform a patch test first to check for skin sensitivity, and follow the product instructions to minimize the risk of irritation, especially on delicate areas. It’s especially important to take extra care when used on sensitive skin.
Are temporary tattoo remover wipes a good option?
Temporary tattoo remover wipes are convenient and pre-moistened with ingredients like oils or mild alcohols to dissolve adhesives quickly. They work well for light tattoos or stencils, but for more stubborn designs, you may need to pair them with additional methods, such as gentle rubbing or an oil soak, to ensure complete removal without skin damage. For more options, consider inkless alternative tattoo removal methods.
What are some hacks for removing temporary tattoos shared on Reddit?
On Reddit, users often recommend hacks like using a paste of baking soda and water to gently exfoliate the tattoo away or applying clear packing tape to lift residue after an initial oil treatment. These methods can be effective for stubborn inks, but always test on a small area first to avoid skin irritation and follow up with moisturizer. From a materials science angle, removal hinges on the chemistry of the ink pigments and how pigment particles interact with solvents and skin. That chemistry helps explain why some colors respond differently to DIY removal methods and why professional laser treatments target specific pigments.
Wrapping Up
When it comes to taking off temporary tattoos and stencils, gentle methods win every time. Start with baby oil or a simple soap and water scrub before you even think about reaching for harsh chemicals. I’ve seen too many people irritate their skin by being overzealous. For the easiest ways to remove temporary tattoos, keep it simple and gentle. These first steps are often all you need.
Remember that your skin’s health is the priority. If a mark proves stubborn, don’t force it; that’s your cue to pause and consider a professional’s help. A little patience at home saves you from a bigger problem later.
Further Reading & Sources
- r/CleaningTips on Reddit: How to remove temporary tattoos from my daughters face without using harsh chemicals?
- How to remove temporary tattoos safely and painlessly | Curology
Ink Fade Lab is your trusted source for tattoo removal insights, combining expert knowledge with compassionate care to help you make informed decisions about your tattoo journey. Based on years of experience in the tattoo removal industry, we are dedicated to providing accurate, up-to-date information to support your choices.
Non-Laser Methods