Eyebrow Tattoo Removal at Home: A Step-by-Step Guide
Published on: December 26, 2025 | Last Updated: December 26, 2025
Written By: Ashita no Joe
Are you staring in the mirror, regretting the shape or color of your permanent brows? I’ve been there myself, both as a client and an artist, and that feeling of being stuck with a tattoo you hate is incredibly frustrating.
This guide cuts through the confusion to give you a realistic look at your options. We will cover the few viable at-home methods, the critical safety measures you must take, and what you can realistically expect from the fading process. Removing pigment from such a delicate area demands extreme caution, and my goal is to provide the honest, professional insight you need to proceed safely, if you choose to.
Understanding Eyebrow Tattoos and At-Home Removal
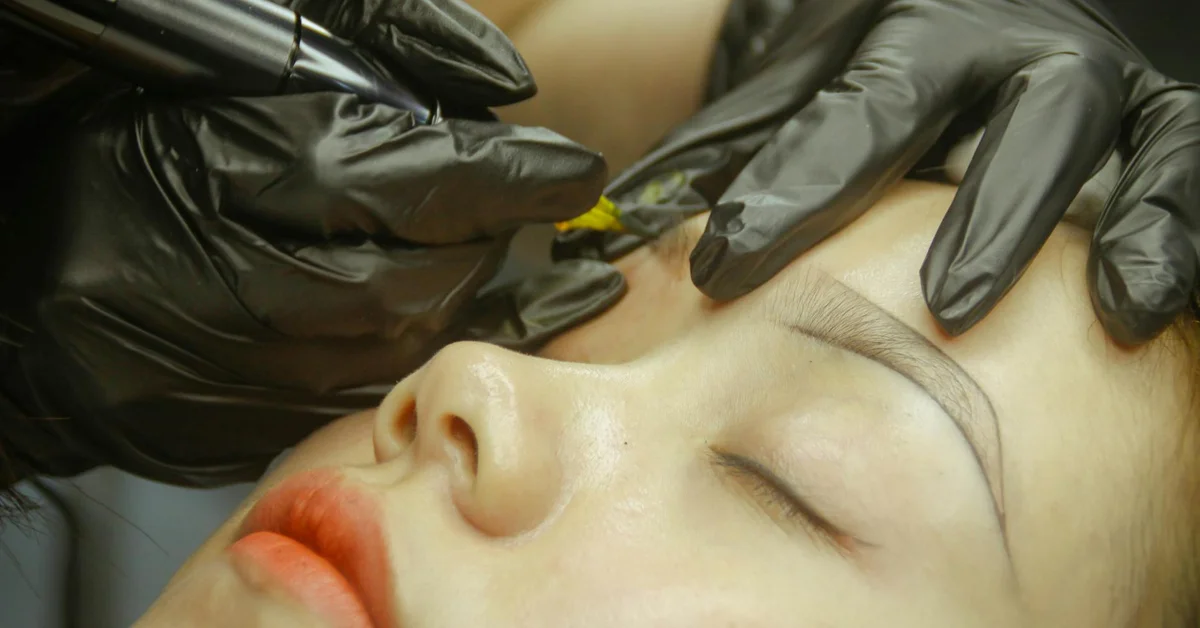
What is an eyebrow tattoo or permanent makeup?
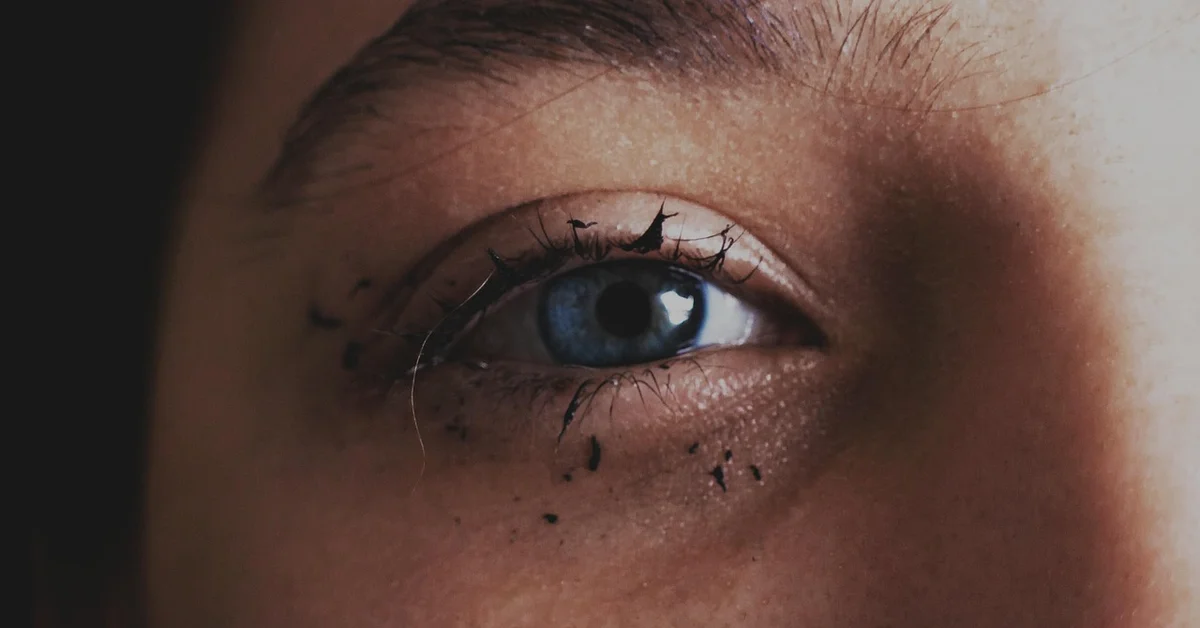
An eyebrow tattoo is a form of cosmetic tattooing where pigment is implanted into the upper layers of your dermis. This is not the same as a traditional body tattoo, as the pigments and depth of application are specifically designed for the face. I’ve performed this procedure countless times, and the goal is to create the illusion of fuller, perfectly shaped brows. The ink sits much more superficially than a standard tattoo, which is a critical detail when we talk about removal later.
Why people seek at-home removal options
I’ve seen a surge in clients wanting to reverse their permanent makeup, and the reasons are deeply personal. The most common drivers I encounter are:
- Style Evolution: The sharp, blocky brows from a decade ago look dated now that soft, feathery strokes are in.
- Poor Workmanship: You might be dealing with asymmetrical shapes, the wrong color turning orange or blue, or simply a bad overall result.
- Financial and Time Constraints: Professional laser removal is expensive and requires multiple appointments, making a DIY solution seem appealing.
- Privacy: Some people feel self-conscious and prefer to handle the fading process in the privacy of their own home.
Key factors affecting removal: pigment composition and healing time
Not all eyebrow tattoos are created equal, and their composition dictates your removal journey. The specific blend of iron oxides and other colorants in cosmetic pigments reacts differently to removal attempts compared to standard tattoo ink. From a tattoo ink materials science perspective, pigment chemistry—particle size, binders, and metal colorants—shapes how the ink responds to laser energy during removal. That’s why different colors and formulations can behave differently under treatment. I’ve personally removed pigments that faded easily and others that stubbornly refused to budge.
Healing time is the other massive factor. Your skin is a complex organ that remembers trauma. Attempting any removal method on a fresh or still-healing tattoo is a direct path to scarring and permanent skin damage. You must wait a minimum of 6-8 weeks after your initial procedure, and I often recommend waiting even longer to let the skin fully stabilize. It’s especially important to follow these guidelines after your first removal session.
Common At-Home Eyebrow Tattoo Removal Methods
Saline removal process and steps
This is the most professional-leaning method you can attempt at home, but it requires precision. It involves using a concentrated salt solution to draw the pigment out of the skin. I have used professional-grade saline removal on clients, and even then, it demands a skilled hand. If you proceed, the basic steps are:
- Acquire a certified, sterile saline removal solution.
- Using a sterile needle, create tiny, superficial punctures in the skin over the pigment.
- Immediately apply the saline solution and let it soak in.
- A scab will form, containing some of the extracted pigment.
This process is not painless and carries a high risk of infection and textural change if done incorrectly.
Chemical exfoliation techniques
People often turn to strong acids like glycolic or trichloroacetic acid (TCA) to burn away the top layers of skin. Using acids on your face is an extremely delicate operation; the margin for error is virtually nonexistent. I’ve treated clients who came to me with chemical burns from misapplied TCA, resulting in hypopigmentation (white spots) that were more noticeable than the original tattoo. This method offers little control over how deep the acid penetrates.
Natural methods and their limitations
The internet is full of “miracle” natural remedies like lemon juice, salt scrubs, and aloe vera. Are natural tattoo removal methods worth considering? In practice, the answer is often no. Let me be blunt: these methods are largely ineffective for removing implanted pigment. They might cause surface-level irritation and slight lightening through exfoliation, but they cannot reach the pigment lodged in your dermis. You will likely just give yourself a rash and raw skin without any meaningful fading of the tattoo itself.
Color fading approaches
This is a more passive strategy focused on encouraging your body to break down the pigment over time. Consistent use of certain products can slightly accelerate your body’s natural fading process. Approaches include applying creams with ingredients like Retin-A to increase skin cell turnover or using specific serums designed to oxidize and break down pigment. Remember, this is a marathon, not a sprint. You might see minor lightening over many months, but complete removal is unlikely. Always patch test any new product on another part of your skin first.
Essential Safety Precautions for DIY Removal
Performing a patch test for allergic reactions
You must test any removal cream or solution on a discreet patch of skin first. Apply a small amount behind your ear or on your inner arm. Wait 24 to 48 hours and watch for redness, swelling, or itching. A patch test is your single most important defense against a severe, full-face allergic reaction. I’ve seen clients ignore this step and end up with reactions far worse than the original tattoo. If itching develops during removal, keep the area clean, avoid scratching, and consult your clinician for safe itch-relief options tailored to the product you’re using. Itching management is a key part of the tattoo removal process.
Hygiene practices to prevent infection risk
Your face is a high-risk zone for infection. Wash your hands thoroughly with antibacterial soap before you touch the area. Clean the eyebrow tattoo and surrounding skin with a gentle, alcohol-free antiseptic. Scrupulous hygiene is non-negotiable when you are creating micro-wounds on your skin. Any bacteria introduced can lead to a serious infection that complicates the entire removal process.
Tools and environment setup to avoid cross-contamination
Set up your workspace like a mini clinic. Wipe down all surfaces with disinfectant. Use single-use, sterile tools like cotton swabs and applicators. Never double-dip into product containers. A clean, organized workspace drastically reduces the chance of contaminating your products and your skin. I lay out everything I need on a fresh paper towel before I begin any at-home procedure.
Contraindications: who should avoid at-home removal
Some people should not attempt this under any circumstances. Do not proceed if you have:
- A history of keloid scarring
- Skin conditions like eczema or psoriasis on or near the area
- A compromised immune system
- Active breakouts, cuts, or sunburn on your forehead
- Are pregnant or breastfeeding
If you fall into any of these categories, your skin’s healing response is unpredictable and potentially dangerous. The risk is simply too high.
Risks and Potential Side Effects
Scarring risk and how to minimize it
Scarring is a permanent trade-off for a temporary mistake. Aggressive scrubbing or using overly harsh chemicals destroys the delicate tissue. To minimize scarring, you must be patient and gentle, allowing the skin to heal fully between sessions. I learned this the hard way on a small tattoo on my own wrist; a rushed job left a faint, shiny scar that outlasted the ink.
Infection signs and inflammation management
Recognize infection early. Watch for persistent redness, pus, yellow crusting, or a throbbing pain that worsens. Any sign of infection means you must stop immediately and consult a doctor. For normal inflammation, a cool compress can provide relief. Do not apply heavy ointments unless they are recommended for wound care.
Dealing with allergic reactions
An allergic reaction can appear as a raging, itchy rash or severe swelling. If this happens after a patch test you did correctly, discontinue use immediately. Gently cleanse the area with water and a mild soap. A topical hydrocortisone cream can calm a mild reaction, but a spreading or severe reaction needs medical attention. The skin around your eyes is particularly sensitive and can swell shut.
Impact on skin and eyebrow hair
The chemicals and abrasion used in removal do not discriminate between tattoo pigment and hair follicles. You risk damaging or permanently destroying the very eyebrow hair you are trying to frame your face with. This can leave you with patchy, thin brows or bald spots that no pencil can easily fix. The goal is to remove ink, not create a new problem.
When to Choose Professional Removal Instead
Comparing at-home removal with laser tattoo removal
At-home methods are a surface-level attack, while professional lasers target the ink deep within your skin.
- DIY Methods: Often involve chemical burns or salt scrubs. Results are inconsistent. High risk of scarring and hypopigmentation.
- Laser Removal: Uses specific light wavelengths to shatter ink particles safely. Your body’s immune system then naturally flushes them out. Far more precise and controlled.
Lasers are designed for selective photothermolysis-they break up ink without systematically destroying the surrounding skin. This is a level of precision you cannot achieve at your bathroom counter. Some home laser tattoo removal kits are marketed as safe and effective, but safety and efficacy vary. Professional guidance is still recommended for reliable results.
Situations requiring dermatologist consultation
You need to see a professional if your tattoo is deep, heavily saturated, or was done by an amateur. Any tattoo that causes raised skin, texture changes, or was applied with unknown pigments is a major red flag. I always refer clients to a dermatologist if I suspect the ink contains metals or is too close to the eye. A professional can assess the ink composition and depth, factors that dictate the safest removal path.
Before-and-after results: realistic expectations
Do not expect your skin to return to its pristine, pre-tattoo state, especially with DIY methods. Professional laser removal offers the best chance for significant fading, but even that requires multiple sessions. Realistic expectations involve understanding that some ghosting or minor textural change may remain, a small price to pay for getting rid of a tattoo you hate. The “after” is about improvement, not always perfection.
Aftercare and Healing Process
Immediate steps post-removal
The minutes and hours after you attempt removal are the most critical for your skin’s recovery. Your first job is to calm the area down. Gently apply a cold compress for 10-minute intervals to reduce swelling and that familiar, throbbing sensation. I keep a dedicated gel pack in my freezer for this exact reason. Do not scrub the area. Let any fluid from micro-blistering dry naturally; picking or peeling is an express ticket to scarring.
Cleanse the area with a mild, fragrance-free soap and pat it dry with a clean paper towel. You must keep the area impeccably clean to prevent a secondary infection, which is a real risk with at-home methods. I advise my clients to apply a thin layer of a recommended ointment, like petroleum jelly, to create a protective barrier. Your skin is an open wound now and needs to be treated as such.
Sun protection and avoiding inflammation
The sun is your number one enemy during the healing process. Freshly treated skin is hyper-vulnerable to UV damage. Sun exposure can cause hyperpigmentation, turning the area you’re trying to clear into a dark, stubborn shadow. I am militant about using a high-SPF, zinc-based sunscreen on any removal site, even on cloudy days. A wide-brimmed hat is your best friend if you must go outside.
Avoid anything that generates heat or friction on the area. This means:
- No strenuous exercise that causes excessive sweating.
- No hot tubs, saunas, or long, steamy showers.
- Skip makeup entirely on the brows until the skin has fully closed.
- Sleep on your back to avoid rubbing your face on the pillow.
Your goal is to let the skin heal in a calm, cool, and clean environment.
Monitoring healing time and color fading
Healing is not a single event; it’s a process that happens in distinct stages. Do not expect immediate, dramatic fading. The initial healing, where the skin closes up, typically takes 7 to 14 days, but the deeper healing and true ink fading can take 6 to 8 weeks. You will see the most noticeable change after the superficial scabbing and flaking have completed.
I tell my clients to take a photo in the same lighting every two weeks to track progress objectively. The ink breakdown is a biological process your body manages. What you’re looking for is a gradual lightening and a softening of the pigment’s edges, not its complete disappearance after one session. Be patient. If you see signs of infection like pus, increasing redness, or a fever, stop everything and see a doctor.
Cost and Effectiveness Comparison
Cost analysis: at-home kits vs professional removal
On the surface, an at-home kit seems like the clear financial winner. Let’s break down the real numbers.
| Method | Estimated Upfront Cost | Potential Hidden Costs |
|---|---|---|
| At-Home Saline/Kits | $50 – $150 | Multiple kit purchases, scar treatment, corrective makeup, dermatologist visits for complications. |
| Professional Laser Removal | $150 – $450 per session | Consultation fees, recommended aftercare products. |
The initial price tag of a DIY kit is a seductive trap that often leads to spending more money fixing a problem it created. I’ve personally spent more on concealer to cover up a botched at-home attempt than I did on a single professional laser session. Professional treatment is an investment with a predictable, safer outcome.
Realistic outcomes and time investment
You must align your expectations with reality. At-home methods rarely deliver complete removal. The most common result from a DIY kit is a faded, sometimes patchy version of the original tattoo, not a clean slate. It can lighten the pigment enough to make it less obvious, but the ghost of your old brows will often remain.
Compare this to the timeline:
- At-Home: Requires consistent weekly or bi-weekly applications over 3-6 months for moderate fading. Each session requires its own healing period.
- Professional Laser: Sessions are spaced 6-8 weeks apart. Most clients see significant clearance in 3-5 sessions, meaning you’re looking at 6-10 months for a near-complete result.
Professional laser removal is a slower, more deliberate process, but each session delivers a powerful, proven result that DIY methods cannot match. You’re trading a long shot for a sure thing. Wondering how many laser sessions you’ll need? Our detailed guide explains typical counts and the factors that influence them.
Frequently Asked Questions
What is the best method for at-home eyebrow hair removal?
For safe and effective at-home eyebrow hair removal, methods like tweezing, threading, or using facial wax strips are popular choices; always start with clean skin, use a mirror in good lighting, and follow the natural brow shape to avoid over-plucking or irritation, and consider applying a soothing aloe vera gel afterward to calm the skin.
How can I safely remove eyebrow tint at home?
To remove eyebrow tint at home, gently apply an oil-based makeup remover or a dedicated tint remover with a cotton pad, leaving it on for a few minutes before wiping away; avoid harsh rubbing and always do a patch test first to prevent allergic reactions or skin damage, as tints are semi-permanent and may require multiple attempts for complete removal.
What are some tips for at-home eyebrow maintenance?
At-home eyebrow maintenance involves regular grooming with tools like spoolie brushes to shape hairs, trimming any long strands with small scissors, and using serums or castor oil to promote hair health; avoid over-tweezing and schedule touch-ups every few weeks to maintain a clean look without compromising skin integrity or hair growth.
Closing Words
Eyebrow tattoo fading is a process demanding patience and precision, not a race to be won with harsh chemicals or aggressive scrubbing. Understanding how the removal progresses helps you set realistic expectations. Tracking changes over weeks and sessions highlights milestones and guides your aftercare. Your skin’s health and final appearance are far more valuable than the speed of removal.
If you take one thing from this guide, let it be this: consult a professional before you attempt anything on your own. I’ve seen the regret from DIY disasters firsthand, and a qualified technician can assess your specific ink and skin to chart the safest course forward.
Further Reading & Sources
- r/MicrobladingRemoval on Reddit: My eyebrow tattoo removal story – be nice and give me your best advice pls 🥹🥹🥹
- Cosmetic Tattoo & Eyebrow Microblading Removal | Removery
Ink Fade Lab is your trusted source for tattoo removal insights, combining expert knowledge with compassionate care to help you make informed decisions about your tattoo journey. Based on years of experience in the tattoo removal industry, we are dedicated to providing accurate, up-to-date information to support your choices.
At-Home Devices & Kits