How to Remove a Tattoo Bandage
Published on: April 9, 2026 | Last Updated: April 9, 2026
Written By: Ashita no Joe
Just got fresh ink and feeling nervous about that first bandage change? That immediate aftercare can feel daunting, but I’ve guided hundreds of clients through this exact moment, and I’m here to walk you through it.
This guide will show you the correct, pain-free way to remove your protective covering without harming your new tattoo. We’ll cover the perfect timing for removal, the safest step-by-step technique, and exactly what to do for aftercare once the bandage is off.
Quick Checklist for Safe Bandage Removal
Follow this simple list every time you remove a bandage to protect your skin.
- Wash your hands thoroughly with antibacterial soap.
- Gather your supplies: clean paper towels, recommended ointment, and a trash bin.
- Find a clean, well-lit area to work in, like a bathroom.
- Slowly peel the bandage back on itself, parallel to the skin.
- If it sticks, use a small amount of lukewarm water to loosen the adhesive.
- Discard the used bandage immediately.
- Gently cleanse the area with a fragrance-free, gentle cleanser.
- Pat the area completely dry with a clean paper towel.
- Apply a thin layer of the aftercare ointment provided by your technician.
Rushing this process is the fastest way to irritate your already sensitive skin. I’ve seen clients tear tiny bits of healing skin because they ripped the bandage off like a birthday present.
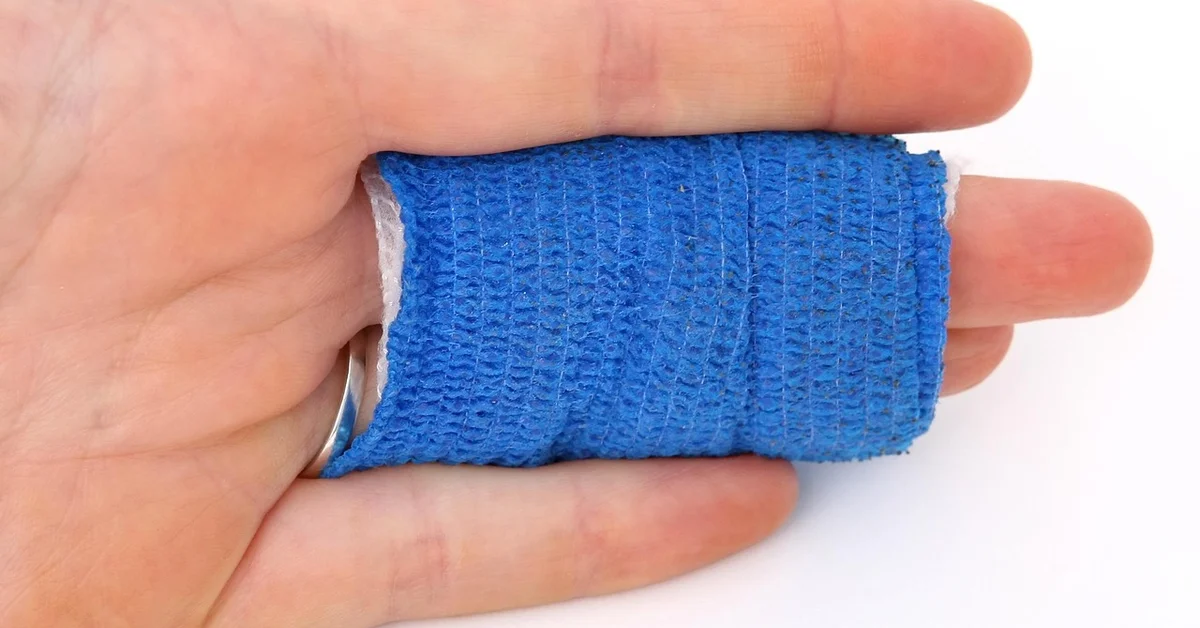
Understanding Tattoo Removal Bandages and Their Role
A removal bandage isn’t just a cover; it’s a critical part of your healing. Its primary job is to create a protective barrier between your vulnerable skin and the outside world. After a laser session, your skin is in a state of controlled trauma, covered in microscopic perforations. The bandage seals out bacteria, dirt, and friction, giving your body a clean slate to start the repair process. I treat my own skin after a removal session with the same respect I give a fresh tattoo-it’s an open wound that needs guarding, especially when you safely treat blisters after laser tattoo removal.
Common Bandage Types in Tattoo Removal
Not all bandages are created equal. The type your technician uses depends on the laser’s intensity and your skin’s reaction.
- Adhesive Polyurethane Films (e.g., Tegaderm): These clear, waterproof sheets are my go-to for most sessions. They lock in your body’s natural healing fluids while keeping external contaminants out. You can usually leave them on for several days.
- Non-Adhesive Pads with Paper Tape: For more aggressive treatments or sensitive skin, a non-stick pad secured with gentle tape is often better. This prevents any adhesive from pulling on the inflamed skin.
- Hydrocolloid Bandages: These are thicker bandages that absorb fluid and form a gel over the wound. They are excellent for sessions that cause significant blistering, as they manage moisture beautifully.
Always use the specific bandage and follow the exact timeline your removal specialist provides. What works for one person’s session might be wrong for another.
Why Proper Bandage Removal Matters
How you take the bandage off directly impacts your comfort and healing speed. Yanking it can reopen micro-wounds, introduce bacteria, and increase inflammation. Improper removal can set your healing timeline back by days and increase the risk of hyperpigmentation or scarring. I’ve had clients ignore this advice and end up with a raw, angry patch of skin that took twice as long to calm down. The goal is to soothe the skin, not re-traumatize it. A gentle, deliberate removal keeps the area intact and ready for the next phase of aftercare. For a clear plan, a day-by-day tattoo removal healing guide can map the steps you’ll take each day. It helps you stay on track and minimize downtime.
When to Remove Your Tattoo Bandage
The timing for taking off your bandage depends entirely on the type of removal procedure you had. Following your technician’s specific timeline is the single most critical factor for preventing infection and promoting proper healing. Laser removal often requires a shorter bandage time than some other methods.
Generally, you will remove the initial protective bandage after a few hours. I’ve seen clients rush this step, only to regret it when their skin becomes irritated and raw. The bandage is there to absorb any initial plasma or lymph fluid and act as a barrier against bacteria. Leaving it on for the prescribed duration creates the ideal environment for the first stage of healing to begin undisturbed.
Step-by-Step Guide to Gentle Bandage Removal
Preparing for Removal
Before you even touch that bandage, get your station ready. Trying to fumble for supplies mid-removal is a recipe for contamination. Proper preparation transforms a potentially painful process into a manageable, controlled task.
- Wash your hands thoroughly with antibacterial soap.
- Gather your supplies: clean paper towels, a fresh, fragrance-free antibacterial soap, and a new, sterile bandage or breathable medical film if recommended.
- Have a trash bag within arm’s reach for immediate disposal of the old bandage.
- Ensure your lighting is good so you can see what you’re doing.
Executing the Removal
This is where patience pays off. Never just rip the bandage off like a stubborn sticker. The goal is to separate the bandage from your traumatized skin without pulling, tugging, or causing further damage. During the saline tattoo removal healing process, some scabbing is normal as the skin recovers. Stick to gentle aftercare to support healing and protect pigment.
- Start by loosening the edges of the bandage. I find it helpful to gently lift a corner.
- Slowly pull the bandage back against itself, not directly up and away from your skin. Imagine you are peeling a banana.
- If the bandage feels stuck, do not force it. Wet the area with lukewarm water in the shower to help dissolve any adhesive and soften the material.
- Once the bandage is off, immediately discard it. Do not let it sit on your counter.
Immediate Aftercare Post-Removal
Cleaning and Disinfecting the Area
Your freshly exposed skin is vulnerable. The first cleaning is about removing any residual fluids and bacteria, not scrubbing. Use only your fingertips and a mild, fragrance-free antibacterial soap with lukewarm water-never hot. I cannot stress the “fragrance-free” part enough; perfumes are a major irritant.
Gently pat the area dry with a clean paper towel. Do not rub. Do not use a communal bath towel, as it harbors bacteria. You should see a clean, slightly inflamed area with no lingering adhesive or seepage. Some redness is normal; angry, spreading redness is not.
Moisturizing and Protecting the Skin
After cleaning, your skin needs a thin layer of protection. I recommend a product like Aquaphor or a dedicated, fragrance-free tattoo aftercare ointment. A thin layer is key—you want to moisturize, not suffocate the skin in a greasy film. I’ve personally found that a pea-sized amount is often enough for an area the size of a palm. For tattoo removal, sensitive skin may require extra gentle care and fragrance-free products. Patch-testing new products before applying them to the area is a good idea, and avoid irritants during healing.
Your technician will advise if you need to re-bandage with a breathable film or if you should let the area air out. Protecting the area from sun exposure and tight clothing is non-negotiable during this initial healing phase. The skin is compromised and needs a calm environment to start rebuilding itself.
Handling Common Removal Challenges
Dealing with Stubborn Adhesive
Sticky residue is a frequent annoyance after peeling off a bandage. I’ve had clients panic and pick at it, which is the worst thing you can do. Never scrub or pick at stubborn adhesive; you risk tearing the fragile new skin underneath. The safest method is to let a small amount of olive oil or coconut oil sit on the residue for a few minutes. Gently wipe it away with a clean, soft cloth. The oil breaks down the glue without the harsh chemicals found in some removers.
If oil doesn’t work, a specialized medical adhesive remover is your next best bet. You can find these at most pharmacies. Apply a tiny amount to a cotton ball and dab-don’t rub-the sticky area. Always ensure the skin is fully rinsed and dried afterward to prevent any chemical irritation on your vulnerable skin.
What to Do If the Bandage Feels Too Tight
A bandage should feel snug, not like a tourniquet. If you feel a throbbing sensation, numbness, or intense pressure, the bandage is too tight. This can restrict blood flow and impede healing. Immediate action is required if a bandage feels excessively tight; do not wait it out.
Carefully peel back one edge of the bandage to relieve the pressure. If the skin underneath looks very pale or has deep indentations, you need to remove the entire bandage. After removal, monitor the area for a quick return of normal color and sensation. If numbness persists, contact your removal technician or a doctor promptly. These steps are part of aftercare following an anesthesia-assisted tattoo removal session. Proper bandage care helps support healing and reduces the risk of complications.
Signs of Complications and When to Act
Your skin will be stressed after a removal session, but you must recognize the difference between normal healing and a true problem. Swelling is common in the first day or two. If it’s excessive or warm to the touch, seek guidance. From my own experience, knowing these signs saved me from a nasty infection.
- Excessive Redness and Swelling: Some is normal, but if it spreads significantly beyond the treated area after the first 24 hours, it’s a warning sign.
- Pus or Yellowish Discharge: Clear fluid or a little plasma is typical. Thick, cloudy yellow or green pus indicates infection.
- Intensifying Pain: The area will be tender, but sharp, increasing, or throbbing pain is not normal.
- Foul Odor: A healing wound shouldn’t smell bad. An unpleasant odor is a classic sign of bacterial growth.
- Fever or Chills: This means your body is fighting a systemic infection, and you need medical attention immediately.
If you observe any of these symptoms, do not attempt to self-treat with DIY remedies. Contact your removal specialist or visit a walk-in clinic without delay. An untreated infection can lead to scarring and complicate future removal sessions.
Reapplying or Changing Bandages
There are times when you’ll need to replace the original bandage. Maybe it got wet, started peeling off, or you needed to remove it because it was too tight. Proper re-application is critical to protect your exposed skin from bacteria. After removal sessions, you may notice scabs forming—managing them properly can support healing. Avoid picking at scabs and follow your clinician’s aftercare instructions to keep the area clean and moisturized.
- First, wash your hands thoroughly with antibacterial soap.
- Gently clean the tattoo removal area with a mild, fragrance-free soap and lukewarm water. Pat it completely dry with a clean paper towel-do not use a cloth towel that harbors germs.
- Apply a very thin layer of the recommended ointment, like a basic petroleum jelly. Too much ointment will create a moist environment where bacteria thrive.
- Apply a new, sterile adhesive bandage or a piece of clean medical wrap. Ensure it fully covers the treated area with a slight border of untouched skin.
I advise my clients to keep the area bandaged for at least the first 3-5 days, changing the bandage daily or anytime it gets wet or dirty. This creates a protective barrier while your skin begins its most delicate phase of repair.
Frequently Asked Questions
What is the proper technique for removing a Saniderm bandage?
To remove a Saniderm bandage safely, gently peel it back parallel to your skin in the direction of hair growth, rather than pulling upward. If the adhesive feels stuck, do this in the shower with lukewarm water running over it to help loosen the glue without irritating the sensitive area.
How long should I leave my tattoo bandage on after a removal session?
The ideal time varies by bandage type and your technician’s instructions, but adhesive films like Tegaderm are often left on for 3-5 days, while non-adhesive dressings may need changing within 24 hours. Always follow your specialist’s guidance to avoid complications and support proper healing.
Is it safe to shower with my tattoo bandage, and how should I remove it afterward?
Yes, most clear adhesive bandages are waterproof, so showering is generally safe. After your shower, pat the bandage dry gently and proceed with removal as usual, but avoid prolonged soaking to prevent the adhesive from weakening too quickly, which could lead to premature peeling.
Wrapping Up
Your tattoo’s future depends entirely on how you handle these first few hours. Treat your fresh ink with the respect it deserves by following a strict 24-hour bandage rule and meticulous cleaning protocol. From my own healing experiences, this disciplined start is what separates a crisp, vibrant tattoo from a faded, patchy one. Knowing when to remove the bandage is crucial to this process.
Resist the urge to peek or re-bandage with anything but a sterile product. Patience and cleanliness are your most powerful tools for ensuring your tattoo heals perfectly and stays infection-free. Your skin has been through a lot; now give it the simple, consistent care it needs to show off that new art. When it’s time to remove the wrap bandage, do so gently and only according to your artist’s instructions. Then rinse the area with lukewarm water and mild soap, pat dry, and continue with your aftercare routine.
Further Reading & Sources
- How to Remove Saniderm: A Guide to Take off a Tattoo Bandage
- Can I take the plastic bandage off my tattoo after a couple hours? I took a shower so it’s coming off, a good quarter of it has already fallen off. Should I cut that part off or take the entire thing off? – Quora
Ink Fade Lab is your trusted source for tattoo removal insights, combining expert knowledge with compassionate care to help you make informed decisions about your tattoo journey. Based on years of experience in the tattoo removal industry, we are dedicated to providing accurate, up-to-date information to support your choices.
Immediate Aftercare