Can You Remove a Tattoo from Keloid-Prone Skin?
Published on: November 7, 2025 | Last Updated: November 7, 2025
Written By: Ashita no Joe
Have you ever looked at an old tattoo and felt a knot of worry tighten in your stomach, knowing your skin tends to form thick, raised scars? I’ve been there myself, both as someone with tattoos and as a professional who has guided clients through this exact concern. That sinking feeling is real, and it’s something I’ve faced head-on in my own studio and on my own skin.
This guide cuts through the confusion to give you a clear, practical path forward based on my hands-on experience. We will explore the specific risks of tattoo removal for keloid-prone skin, break down the safest professional methods available today, and I’ll share the critical steps you must take to protect your skin from further damage.
Understanding Keloids and Keloid-Prone Skin
Define keloids and differentiate from hypertrophic scars
Let’s get straight to the point. A keloid is more than a scar; it’s an aggressive overgrowth of scar tissue that expands far beyond the original wound’s borders. Unlike a standard scar that fades, a keloid is a living, growing tissue that often has a shiny, domed appearance and can be itchy or painful. I’ve seen them feel rubbery and look much darker than the surrounding skin.
Many people confuse them with hypertrophic scars, but the difference is critical. A hypertrophic scar is raised but stays within the boundary of the initial injury. Think of it as a contained reaction. A keloid, however, behaves like an invasive plant, spreading into healthy skin. This invasive nature is the core reason tattoo removal becomes a high-stakes procedure for keloid-prone individuals.
List common risk factors like genetics and Fitzpatrick skin type
Your likelihood of forming keloids isn’t random; it’s often written into your biology. The primary culprits are:
- Genetics: This is the biggest factor. If your parents or siblings form keloids, your risk is significantly higher.
- Skin Pigmentation (Fitzpatrick Type): People with darker skin tones (Fitzpatrick types IV-VI) have a much greater predisposition to keloid formation.
- Age: You’re most susceptible between puberty and age 30.
- Location: Areas with high skin tension like the chest, shoulders, back, and earlobes are prime keloid territory.
I always tell clients that knowing your personal and family history is the first and most powerful step in assessing your risk. Your skin’s past behavior is the best predictor of its future reaction.
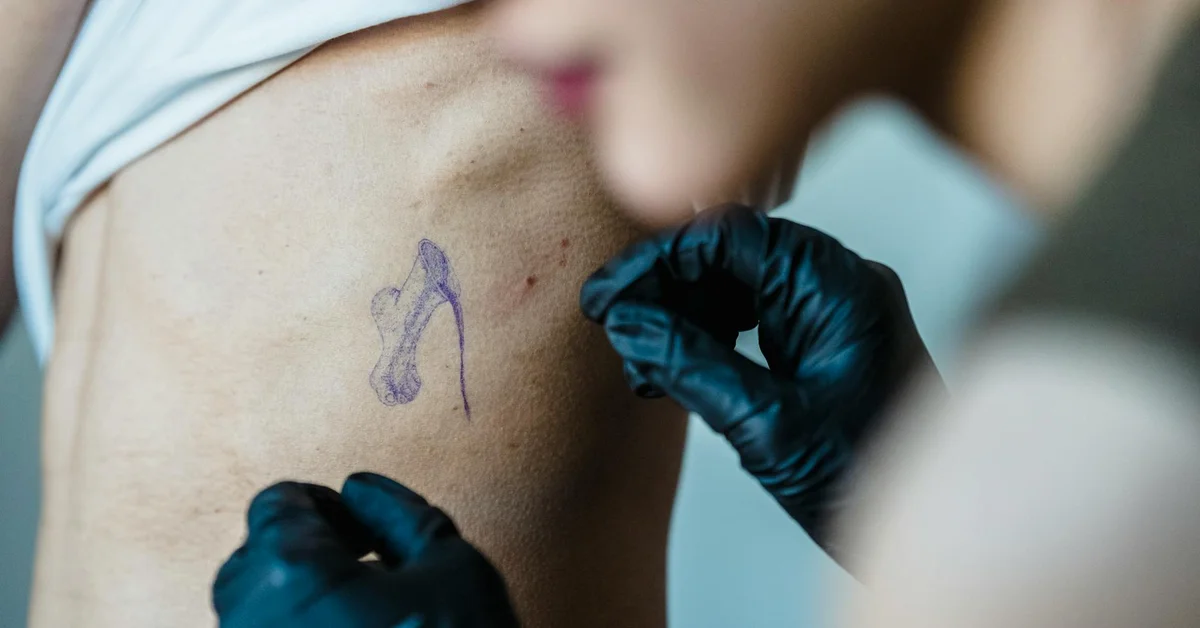
Explain how tattoo ink and removal can trigger keloid formation
Both getting a tattoo and removing one are processes that create controlled injury. A tattoo gun deposits ink by creating thousands of micro-wounds in the dermis. For a body that heals with keloids, this initial trauma can be the very trigger that starts an uncontrollable scar. I’ve personally seen a small tattoo blossom into a large, ropy keloid. In tattoo removal, the skin goes through its own stages—initial inflammation and swelling, followed by gradual pigment breakup and fading over multiple sessions. Understanding these stages helps set expectations and minimize further trauma.
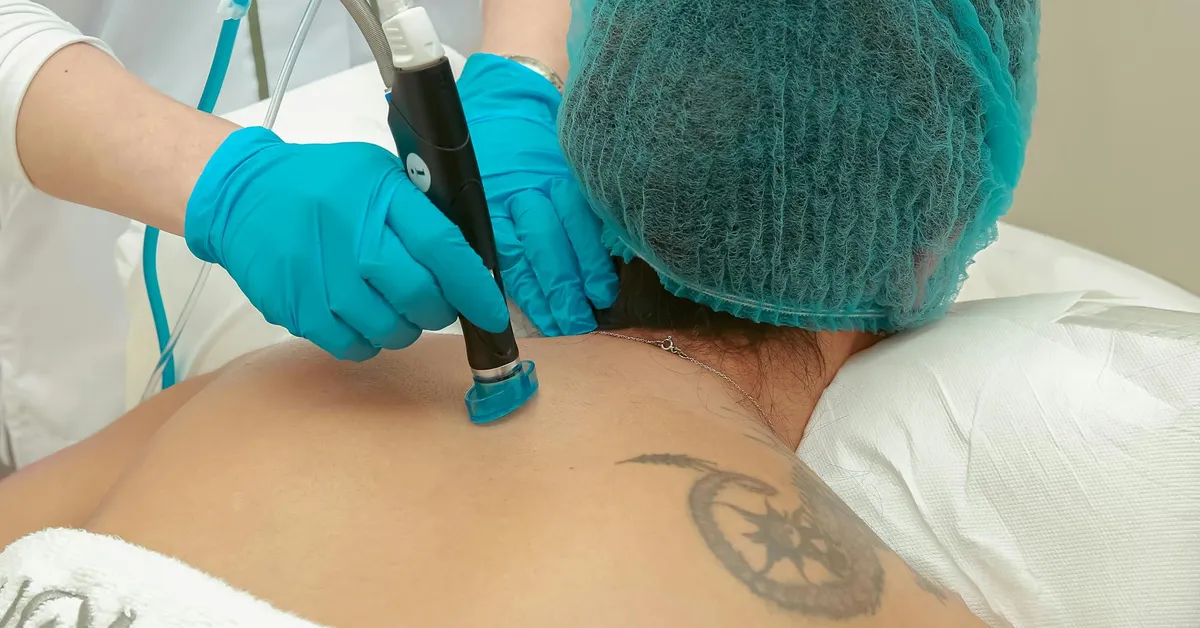
Laser tattoo removal works on the same principle of controlled damage. The laser shatters ink particles by delivering intense, focused light and heat energy. This process creates a fresh inflammatory response, essentially re-injuring the skin and presenting a second major opportunity for a keloid to form. The risk isn’t just from the initial tattoo wound; it’s doubled down on by the removal process itself. To put this into perspective, here’s how the tattoo removal process works, step by step. This explanation helps you anticipate healing and care needs.
Pre-Treatment Evaluation and Risk Assessment
Steps for dermatology consultation and skin history review
Do not skip this step. Ever. Walking into a laser clinic without a dermatologist’s clearance for keloid-prone skin is a major gamble. A proper consultation involves:
- Finding a board-certified dermatologist with experience in both scar management and laser surgery.
- Undergoing a full-body skin check to identify any existing, dormant, or healed keloids you might have forgotten about.
- Providing a complete personal and family medical history focused on scarring.
A thorough dermatologist will treat your skin history like a detective solving a case, looking for every clue to predict your body’s reaction. This isn’t a casual chat; it’s a necessary medical investigation.
Assess personal keloid history and tattoo ink colors
You need to conduct a brutally honest self-audit before anyone even turns on a laser. Ask yourself these questions:
- Have I ever formed a keloid from a cut, burn, piercing, or acne?
- Where was it located, and how large did it grow?
- How did my skin react to the tattoo application itself? Was it excessively raised or itchy for months?
The color of your tattoo ink also plays a role in the removal risk assessment. Darker inks like black and dark blue are typically easier and safer to remove with specific lasers. Lighter colors like red, yellow, and green can be more challenging and sometimes require different laser wavelengths, which may carry a slightly different risk profile. White ink removal challenges present their own removal difficulties and may require different laser settings and more sessions, with results that can be less predictable. Your specialist needs to map the ink colors against your skin’s history.
Evaluate scar risk and set realistic expectations
Based on the consultation and history, your provider will assign you a risk category. You must understand that ‘success’ for keloid-prone skin may not be perfectly clear skin, but a flat, smooth, and symptom-free scar. Complete ink removal without any textural change is often an unrealistic goal.
The evaluation will determine the protocol. This might mean using lower laser energy settings, longer intervals between sessions, or combining laser treatment with preventative measures like corticosteroid injections or silicone gels from the very beginning. In tattoo removal clinics, laser safety protocols guide every step—from eyewear and room shielding to calibrated energy delivery. This ensures patient and staff safety while enabling effective treatment. Managing your expectations from the outset prevents disappointment and helps you make an informed decision about whether to proceed at all. Sometimes, the safest option is to leave the tattoo alone.
Laser Tattoo Removal Methods for Keloid-Prone Skin
Compare Q-switched, Nd:YAG, picosecond, and alexandrite lasers
Not all lasers are created equal, especially when your skin has a history of forming thick scars. The laser’s wavelength and pulse duration are everything here.
I rely most on the Nd:YAG laser for clients who scar easily because its longer wavelength penetrates deeper with less absorption by melanin, making it safer for diverse skin tones. The Q-switched Nd:YAG is the industry workhorse for this very reason.
Picosecond lasers are the newer, faster option. They shatter ink into finer particles with a shorter pulse. While effective, the intense, rapid energy can be more provocative for sensitive skin. I use it with extreme caution.
Alexandrite lasers operate at a shorter wavelength that is highly absorbed by melanin. I generally avoid alexandrite lasers on keloid-prone skin because the risk of hyperpigmentation and thermal injury is simply too high.
| Laser Type | Best For | Keloid Risk Consideration |
|---|---|---|
| Q-switched Nd:YAG | Deeper ink; all skin tones | Lower risk due to deep penetration and less epidermal damage. |
| Picosecond | Stubborn colors; faster treatment | Higher risk; ultra-short pulse can be overly aggressive. |
| Alexandrite | Blue/Green ink on fair skin | Highest risk; not recommended for keloid-prone individuals. |
Discuss laser settings to minimize scar risk and ink migration
The technician’s skill is measured by their ability to adjust settings. We are walking a tightrope between breaking up ink and triggering a scar.
- Lower Fluence: I start with lower energy levels and gradually increase. High fluence creates excessive heat, the primary driver of scar tissue formation.
- Larger Spot Size: A wider beam distributes energy more evenly across the skin, preventing concentrated hot spots that can lead to injury.
- Appropriate Wavelength: As discussed, the 1064 nm wavelength of the Nd:YAG is my go-to for its safety profile on sensitive skin.
- Adequate Cooling: Robust cryogen cooling before, during, and after each laser pulse is non-negotiable. It protects the upper layers of your skin from thermal damage.
Proper settings prevent ink migration, where shattered particles are pushed deeper into the dermis instead of being cleared, leading to a blurry, shadowed appearance. I’ve corrected this on clients who went to less experienced providers.
Outline the process and number of sessions typically needed
Patience is not just a virtue here; it’s a medical necessity. Rushing the process guarantees problems.
- Consultation and Patch Test: We must do a small test spot in an inconspicuous area. We wait 6-8 weeks to see how your skin reacts before even considering a full session.
- The Sessions: Each session lasts mere minutes. The laser feels like a rubber band snapping against your skin. We immediately apply ice to soothe the area.
- The Waiting Period: You must wait a minimum of 8-12 weeks between sessions. This extended healing time is critical for keloid-prone skin to fully recover and for us to assess its response without layering trauma.
For a typical tattoo, expect 8-12 sessions for significant fading. For keloid-prone skin, it could be more. The goal shifts from complete removal to the best possible fading without causing a new, permanent scar that’s worse than the tattoo. Tattoo removal progress can vary greatly from person to person.
Non-Laser Tattoo Removal Alternatives
Describe surgical excision risks and suitability
Surgical excision involves a doctor cutting out the tattooed skin and stitching the wound closed. It’s a one-and-done solution in theory, but there’s a lot to consider, especially if skin grafting is necessary.
For someone who forms keloids, this is often the riskiest option available. You are literally creating a linear incision, which is a perfect blueprint for a keloid to form. I have a small scar from a tattoo excision on my own arm that puffed up, and it was a fight to calm it down. The resulting scar can be more raised, discolored, and noticeable than the original tattoo.
This method is only suitable for very small tattoos, and even then, it should be a last resort after all other options have been thoroughly discussed, especially non-invasive ones like non-invasive removal techniques.
Cover other methods like camouflage makeup or ink fading techniques
When lasers are too risky, we look at other paths.
- Tattoo Camouflage (Makeup): Specialized, highly pigmented concealers like Dermablend can mask a tattoo completely. It’s waterproof and long-lasting, but it washes off. This is a fantastic, zero-risk option for special occasions.
- Tattoo Fading Creams: Topical creams containing TCA (Trichloroacetic Acid) or other fading agents can slowly lighten a tattoo over many months. I caution against strong at-home chemical peels, as they can cause burns and subsequent scarring. Professional, controlled application is a must.
- Salabrasion/Dermabrasion: These older methods sand away the top layers of skin. I do not recommend them. They are imprecise, painful, and have an extremely high risk of scarring and infection.
Weigh pros and cons for keloid-prone individuals
| Method | Pros | Cons |
|---|---|---|
| Laser Removal | Most effective fading; non-invasive; can be tailored. | Still carries a scar risk; lengthy and expensive process. |
| Surgical Excision | Permanent, immediate removal of the tattoo. | Highest risk of forming a new, larger keloid. |
| Camouflage Makeup | Instant, zero-risk, completely reversible. | Not permanent; requires daily application. |
| Fading Creams | Low-risk, gradual lightening from home. | Very slow; results are often subtle; can cause irritation. |
The Tattoo Removal Process and Healing Timeline
Detail what happens during and after removal sessions
The session itself is quick. Your skin will be cleaned, and you’ll wear protective eyewear. The laser handpiece is placed against your skin. Each pulse feels like a hot pinch or a splash of grease.
Immediately after, the area will look and feel like a superficial burn. It’s red, swollen, and tender. We apply ice packs immediately to reduce inflammation and prevent blistering, which is a gateway to scarring. A protective ointment and bandage are applied.
White, frothy-looking skin is a normal, positive reaction called “frosting.” It indicates the ink particles have been successfully shattered.
Explain healing time, pigment fading, and potential side effects
The first 48 hours are critical. You must keep the area clean, moist with ointment, and covered.
- Days 1-3: Redness, swelling, and tenderness peak. Small blisters may form. Do not pop them.
- Week 1: Swelling subsides. Blisters crust over and slough off. The skin underneath is pink and new.
- Weeks 2-8: The skin returns to its normal texture and color. The tattoo will appear slightly lighter. The true fading happens slowly over the next 6-8 weeks as your immune system clears the ink debris.
Potential side effects beyond scarring include hypopigmentation (lightening of the skin), hyperpigmentation (darkening of the skin), and textural changes. These are more common in skin prone to dyspigmentation.
Share before and after results and what to monitor
You will not see dramatic results after one session. Expect a 10-20% fade each time. The best results appear after the 4th or 5th session, once the deeper layers of ink are targeted.
You must monitor your skin for signs of hypertrophy after every session. Look for any unusual, persistent itching, raised texture, or a pink/red border that seems to be expanding beyond the treatment area. This is the early warning sign of a keloid. If you see this, contact your provider immediately-do not wait for your next scheduled appointment. Catching it early is the key to managing it.
Post-Treatment Care and Scar Management
List steps for aftercare including silicone gel sheets
After a laser session on keloid-prone skin, your aftercare protocol is your most powerful tool. I treat this phase with the same seriousness as the procedure itself. Your immediate actions directly dictate your long-term skin texture and appearance.
- Apply a cold compress for 15-minute intervals during the first 24 hours to control swelling and soothe the intense heat sensation.
- Gently cleanse the area twice daily with a mild, fragrance-free soap and pat it completely dry with a clean paper towel.
- Apply a thin layer of the prescribed antibiotic ointment to create a protective barrier against infection.
- Once the skin has fully closed and any weeping has stopped-typically after 3-5 days-begin using medical-grade silicone gel sheets. Cut a sheet to fit the treated area precisely and wear it for 12+ hours daily.
- Keep the area shielded from the sun with a high-SPF, zinc-oxide-based sunscreen or protective clothing for at least three months.
Discuss long-term scar management and monitoring for recurrence
Scar management is a marathon, not a sprint. Keloid-prone tissue has a long memory and can reactivate the scarring process months later. You must become a diligent observer of your own skin, watching for the earliest signs of thickening or raised texture. I instruct my clients to perform a weekly visual and tactile check, running a clean finger over the area to feel for any subtle changes. If you notice any new firmness or itching, resume silicone sheet therapy immediately-this early intervention can often halt a keloid’s development. This vigilance is a non-negotiable part of the process for at least a full year post-removal.
Recommend products and practices to support skin recovery
Your product choices need to be intentional and gentle. I have seen clients undermine perfect laser work with harsh, irritating products. Invest in a simple, hydrating, and reparative routine to give your skin the best foundation for healing.
- Silicone Gel Sheets: Brands like ScarAway or Cica-Care are my go-to. They work by hydrating the scar tissue and signaling it to flatten.
- Moisturizer: Use a product with centella asiatica (cica) or panthenol. La Roche-Posay Cicaplast Baume B5 is an excellent choice for calming and repairing the skin barrier.
- Sun Protection: EltaMD UV Clear Broad-Spectrum SPF 46 is a favorite in my clinic; it’s formulated for sensitive, post-procedure skin.
- Practice: Avoid any activity that causes friction on the area. Do not pick, scratch, or use exfoliating acids on the healing skin.
Real-World Insights and Personal Experiences
Summarize common questions from forums like Reddit
Scrolling through forums, I see the same fears and questions echoed by people in your exact situation. The anonymity of the internet allows for raw honesty. The most frequent question is a desperate one: “Has anyone with a history of keloids successfully removed a tattoo without getting another one?” They are searching for a sliver of hope and real-world proof. Other common themes include asking about the specific pain level compared to the tattoo itself, the horror stories of DIY removal attempts, and seeking recommendations for specialists who didn’t dismiss their concerns outright.
Share case studies or anecdotes on outcomes and challenges
I worked with a client, Sarah, who had a small keloid on her collar bone from a piercing. She wanted a name lasered off her wrist. We proceeded with extreme caution, using longer wavelengths and greater spacing between sessions. The removal was successful, but a slight, rope-like texture developed along the deepest parts of the old ink. It wasn’t a full-blown keloid, but it was a permanent textural change—a compromise she was prepared for. In my own experience, I had a tattoo removed from my ankle, an area prone to thick skin. I used silicone gel sheets religiously for six months. Silicone gel sheets are commonly recommended after tattoo removal to help prevent scarring by maintaining moisture and providing a protective barrier. When used consistently, they can help minimize texture changes and support smoother healing. Today, the skin is smooth, but it took relentless consistency. These stories highlight that success is often defined by minimized scarring, not necessarily perfection.
Highlight key takeaways for individuals considering removal
If you are keloid-prone and considering tattoo removal, let this be your guide. Your journey will be slower, more expensive, and require more personal discipline than the average person’s. You must accept that some textural or pigment change is a very likely outcome. The goal is to make that change as minimal and flat as possible. Your number one priority is finding a provider who respects your skin’s history and doesn’t promise you the impossible. Go in for a test spot and wait a full three months to see how your skin reacts. This is the single most important step you can take to avoid a catastrophic outcome. This is all part of your journey toward complete tattoo removal. Stay patient and work with a provider who respects your skin history—the finish line is achievable with the right plan.
Frequently Asked Questions
What is keloid laser tattoo removal?
Keloid laser tattoo removal is a specialized procedure using devices like Q-switched or Nd:YAG lasers to break down tattoo ink in individuals prone to keloids, focusing on lower energy settings and longer intervals between sessions to minimize the risk of triggering new scar formation while aiming for gradual ink fading.
What happens to a keloid after laser tattoo removal?
After laser tattoo removal, an existing keloid may become irritated or inflamed due to the controlled injury from the laser, potentially leading to increased thickness, itching, or pain; close monitoring and proactive scar management, such as silicone gel sheets, are essential to prevent worsening and encourage flattening over time.
What do Reddit discussions say about tattoo removal and keloids?
Reddit discussions often highlight personal anxieties and shared experiences, with users frequently asking if others with keloid-prone skin have successfully undergone tattoo removal without new scarring, while also seeking recommendations for knowledgeable providers and sharing cautionary tales about DIY methods that led to adverse outcomes.
Closing Words
Removing ink from skin that forms keloids is a high-stakes process. Your primary step must always be a consultation with a dermatologist who specializes in scar tissue. They can assess your specific skin and determine if laser treatment is a viable path, as the risk of creating a new, more prominent scar is very real.
In my own practice, I’ve seen successful outcomes, but they were always preceded by immense patience and careful professional management. This journey is not about quick fixes; it’s a deliberate, medically-guided process to minimize texture and color. Trust the experts, manage your expectations, and prioritize the long-term health of your skin over the speed of ink removal. It is critical to understand the role of fading in tattoo removal when embarking on this journey.
Further Reading & Sources
- Keloid Tattoo: When Scars Form, Tattooing Over Keloids, More
- Keloid Formation After Laser Tattoo Removal – Keloid Removal Expert – New York
Ink Fade Lab is your trusted source for tattoo removal insights, combining expert knowledge with compassionate care to help you make informed decisions about your tattoo journey. Based on years of experience in the tattoo removal industry, we are dedicated to providing accurate, up-to-date information to support your choices.
Risks & Safety